Any season is the perfect season to study the weather and get your students outdoors for hands-on activities. From reading and writing about the weather to conducting experiments and more, here’s our list of weather activities for the classroom, perfect for preschool through middle school.

1. Read books about weather
What you need: Read-aloud weather books
Read-alouds are some of the most simple classroom activities that teach kids about weather. Get your students amped up about studying the weather with a flood of books. Read a few aloud, feature them in your classroom library, and let students study them with partners.
Learn more: Awesome Weather Books for Kids
2. Watch the fog roll in

What you need: Glass jar or a glass, hot water, metal strainer, ice cubes
Fill a glass or jar with hot water for about a minute. Pour out almost all the water, leaving about 1 to 2 inches in the glass. Place a strainer with ice cubes on top.
As the cold air from the ice cubes collides with the warm, moist air in the bottle, the water will condense and fog will form. This is one of those weather activities that will inspire plenty of oohs and aahs!
3. Crack a few weather jokes
What you need: Free Weather Jokes for Kids Google Slides
Want to incorporate a little humor into your weather activities? Try some weather-themed jokes! Why is the sun so smart? Because it has more than 5,000 degrees! Bring a little weather humor into your classroom with this collection of jokes and riddles.

Looking for a forecast of fun? Get our free Weather Jokes for Kids Google Slides!
4. Reflect a rainbow
What you need: Glass jar, white sheet of paper
What to do: Fill the glass with water all the way to the top. Put the glass of water on a table so that it is half on the table and half off the table (make sure that the glass doesn’t fall!). Then, make sure that the sun can shine through the glass of water. Next, place a white sheet of paper on the floor. Adjust the piece of paper and the glass of water until a rainbow forms on the paper.
How does this happen? Explain to students that light is made up of many colors: red, orange, yellow, green, blue, indigo, and violet. When light passes through the water, it is broken up into all of the colors in a rainbow!
5. Learn weather vocabulary words

What you need: Weather word wall labels and visuals for each word
Give your students the language to describe all kinds of weather. Words like sunny, cloudy, stormy, blizzard, flood, hurricane, the four seasons, etc., can be used for many activities, such as helping students fill in their weather journals. Prepare a deck of weather word cards for students to use at center time. Or create a weather word wall for students to reference and practice.
6. Predict rain using pine cones
What you need: A handful of pine cones
Make a pine-cone weather station! Lay out a bunch of pine cones on a windowsill in your classroom. Observe the pine cones and the weather daily. Note that when the weather is dry, the pine cones stay open. When it’s about to rain, the pine cones close! This is a great way to talk about weather prediction with students.
How does this work? Pine cones actually open and close based on the humidity to help seed dispersal.
7. Create your own lightning
What you need: Aluminum pie tin, wool sock, Styrofoam block, pencil with eraser, thumbtack
To begin, push a thumbtack through the center of a pie tin from the bottom. Push the eraser end of a pencil onto the thumbtack and place the tin to the side.
Next, vigorously rub a wool sock on a block of Styrofoam for a couple of minutes. Then, pick up the aluminum pie pan, using the pencil as a handle, and place it on top of the Styrofoam block. Touch the aluminum pie pan with your finger—you should feel a shock! If you don’t feel anything, try rubbing the sock on the Styrofoam block again. Once you feel the shock, try turning the lights out before you touch the pan again. You should see a spark, like lightning!
How does this work? Static electricity. Lightning happens when the negative charges (electrons) in the bottom of the cloud (or in this experiment, your finger) are attracted to the positive charges (protons) in the ground (or in this experiment, the aluminum pie pan). The resulting spark is like a mini lightning bolt.
8. Make a severe-weather plan for your family
What you need: Paper and a pencil
Knowing where to go and what to do in a dangerous weather event is important information for every member of your family. Many families already have a plan for what to do in case of a fire, but what’s the procedure for a tornado, flood, or hurricane? Making an action plan before an event happens ensures you’ll all make it through safe and sound.
9. Use shaving cream to make rain

What you need: A jar or glass, water, shaving cream, food coloring
This experiment is fun and easy. Fill the jar two-thirds full with water. Then squirt a generous amount of shaving cream on top (for the clouds). Finally, add a few drops of blue food coloring at the top and watch it “rain.” Explain to your students that this is what happens when clouds become heavy with water—they can’t hold all that liquid and it rains!
10. Conjure up lightning in your mouth
What you need: A mirror, a dark room, wintergreen Life Savers
Turn off the lights and have students wait until their eyes have adjusted to the dark. Bite down on a wintergreen candy while looking in the mirror. Chew with your mouth open and you’ll see that the candy sparks and glitters.
How does this work? You are actually making light with friction, called triboluminescence. As you crush the candy, the stress creates electric fields, like electricity in a lightning storm. When the molecules recombine with their electrons, they emit light. Why wintergreen candy? It converts ultraviolet light into visible blue light, which makes the “lightning” brighter to see.
11. Track a thunderstorm
What you need: Thunderstorm, stopwatch, journal
This is an exciting activity to do with your students on a stormy day. Wait for a lightning flash and then start the stopwatch immediately. Stop when you hear the sound of thunder. Have students write down their numbers. For every five seconds, the storm is 1 mile away. Divide their number by five to see how many miles away the lightning is.
How does this work? Light travels faster than sound, which is why it takes longer to hear the thunder.
12. Make a thunderstorm front
What you need: Clear plastic shoebox, red food coloring, ice cubes made with water and blue food coloring
What to do: Fill a plastic shoebox two-thirds full with lukewarm water. Let the water sit for a minute to come to air temperature. Place a blue ice cube into the container. Drop three drops of red food coloring into the water at the opposite end of the container. Watch what happens!
How does this work? The blue cold water (representing a cold air mass) sinks, while the red warm water (representing the warm, unstable air mass) rises. This is called convection—the warm air is forced to rise by the approaching cold front, and the thunderstorm forms.
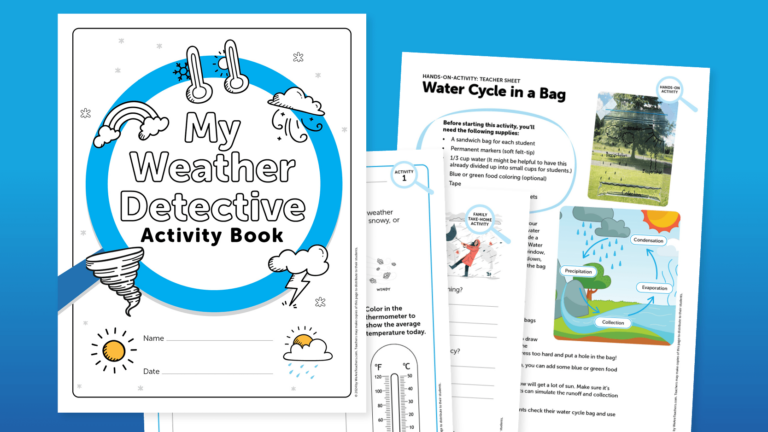
13. Create a water cycle in a bag

What you need: Quart-size snack bags, Sharpie, food coloring, and tape
Download our free worksheet bundle and get step-by-step instructions for students to make their own water cycle models using simple, everyday materials. Each student will be able to tape their station to a window, and each day they can observe the steps of the water cycle.

FREE SLIDES
Ready to get started teaching your students about the water cycle? Grab our free Water Cycle for Kids Google Slides.
14. Create a tornado in a bottle
What you need: Two 2-liter clear plastic bottles (empty and clean), water, food coloring, glitter, duct tape
Students love classic weather activities like this one and there are plenty of videos on the internet that demonstrate the process. To begin, fill one of the liter bottles two-thirds full of water and leave the other one empty. Add food coloring and a dash of glitter. Use duct tape to fasten the two containers together (be sure to tape tightly so that no water leaks out when you turn the bottles over.) Flip the bottles so that the bottle with the water is on top. Swirl the bottle in a circular motion and watch the tornado appear.
How does this work? The circular motion creates a vortex and a tornado will form in the top bottle as the water rushes into the bottom bottle.
15. Make a warm and cold front model
What you need: Two drinking glasses, red and blue food coloring, glass bowl, cardboard
Fill one glass with chilled water and a couple of drops of blue food coloring. Fill the other with hot water and red food coloring. Cut a piece of cardboard so that it fits snugly into the glass bowl, separating it into two sections. Pour the hot water into one half of the bowl and cold water into the other half. Quickly and carefully pull the cardboard separator out. The water will swirl and settle with the cold water on the bottom, the hot water on top, and a purple zone where they mix in the middle.
16. Play a round of weather charades
What you need: Paper, pencil, paper bag
Write different weather types—lightning, blizzard, rainbow, etc.—on scraps of paper and place them in a paper bag. Divide students into two teams. Have a player from team 1 choose a slip of paper from the bag and act out the weather word for their team without saying a word. If their team guesses correctly, they get a point. If not, the other team gets a chance to guess and earn a point. Play then switches to team 2. Continue until the bag is empty and all the words have been acted out.
17. Use ice and heat to make rain

What you need: Glass jar, plate, hot water, ice cubes
Another simple weather experiment that packs a punch. Fill the jar one-third full with hot water. Then place a plate full of ice cubes on top of the jar. Condensation will begin to build and water will stream down the sides of the jar. This experiment works because the hot water trapped in the jar creates a warm, moist environment (water vapor). When the water vapor hits the cold plate of ice cubes, it cools down and condenses into tiny liquid water droplets, forming a “cloud.” When the droplets become heavy enough, they fall back down, simulating rain.
18. Grow a snowflake
What you need: String, wide-mouthed jar, long white pipe cleaners, blue food coloring, boiling water, borax, a pencil
Who doesn’t have fond childhood memories of making crystal snowflakes? To make your snowflake frame, cut a long white pipe cleaner into thirds. Twist the three sections together in the center so that you now have a shape that looks something like a six-sided star. Make sure the lengths of the star are equal by trimming them to the same length. Tie the snowflake to the pencil with string. Carefully fill the jar with boiling water (adult job). For each cup of water, add three tablespoons of borax, one tablespoon at a time. Stir until the mixture is dissolved, but don’t worry if some of the borax settles at the base of the jar. Add food coloring. Hang the snowflake in the jar. Let sit overnight, and voilà! A crystal snowflake.
How does this work? A borax crystal experiment works by creating a super-saturated solution of borax in hot water, which then crystallizes as it cools. When the hot, supersaturated solution cools, it can no longer hold all the dissolved borax, so the excess borax solidifies and attaches to a surface like a pipe cleaner, forming crystals.
19. Make magic snowballs
What you need: Frozen baking soda, cold water, vinegar, squirt bottles
What to do: Start by mixing two parts baking soda with one part water to make fluffy, moldable snowballs. Then, pour vinegar into squirt bottles and let kids squirt their snowballs. The reaction between the baking soda and vinegar will cause the snowballs to fizz and bubble.
20. Keep a daily weather log

What you need: Printable daily weather logs and crayons, markers, and/or colored pencils
Weather is something that happens every day, but often we don’t pay it much attention. To help your students learn more about weather, have them create a daily weather log. They can use a journal, a homemade booklet, or download our free weather bundle and get a pre-made weather log that’s ready to go.
21. Catch the wind with a pinwheel
What you need: Pinwheels
Pinwheels are a fun way for kids to learn about the power of the wind. Buy a collection of colorful pinwheels at the dollar store or on a discount site such as Oriental Trading. Better yet, search for an online tutorial and let your students make their own. Then, when you go outside each day to make your weather observation, have them test the strength and direction of today’s wind.
22. Make a simple wind sock
What you need: One large plastic bag such as a grocery bag, one empty plastic container such as a yogurt or sour cream tub, clear packing tape, string or yarn, ribbons or streamers to decorate
To begin, cut the rim off of the plastic tub. Wrap the edge of the plastic bag around the rim and secure it with tape. Using a hole punch, make a hole in the bag just below the plastic ring. If you don’t have a hole punch, you can use a pencil. Tie a string through the hole and attach to a post or high railing.
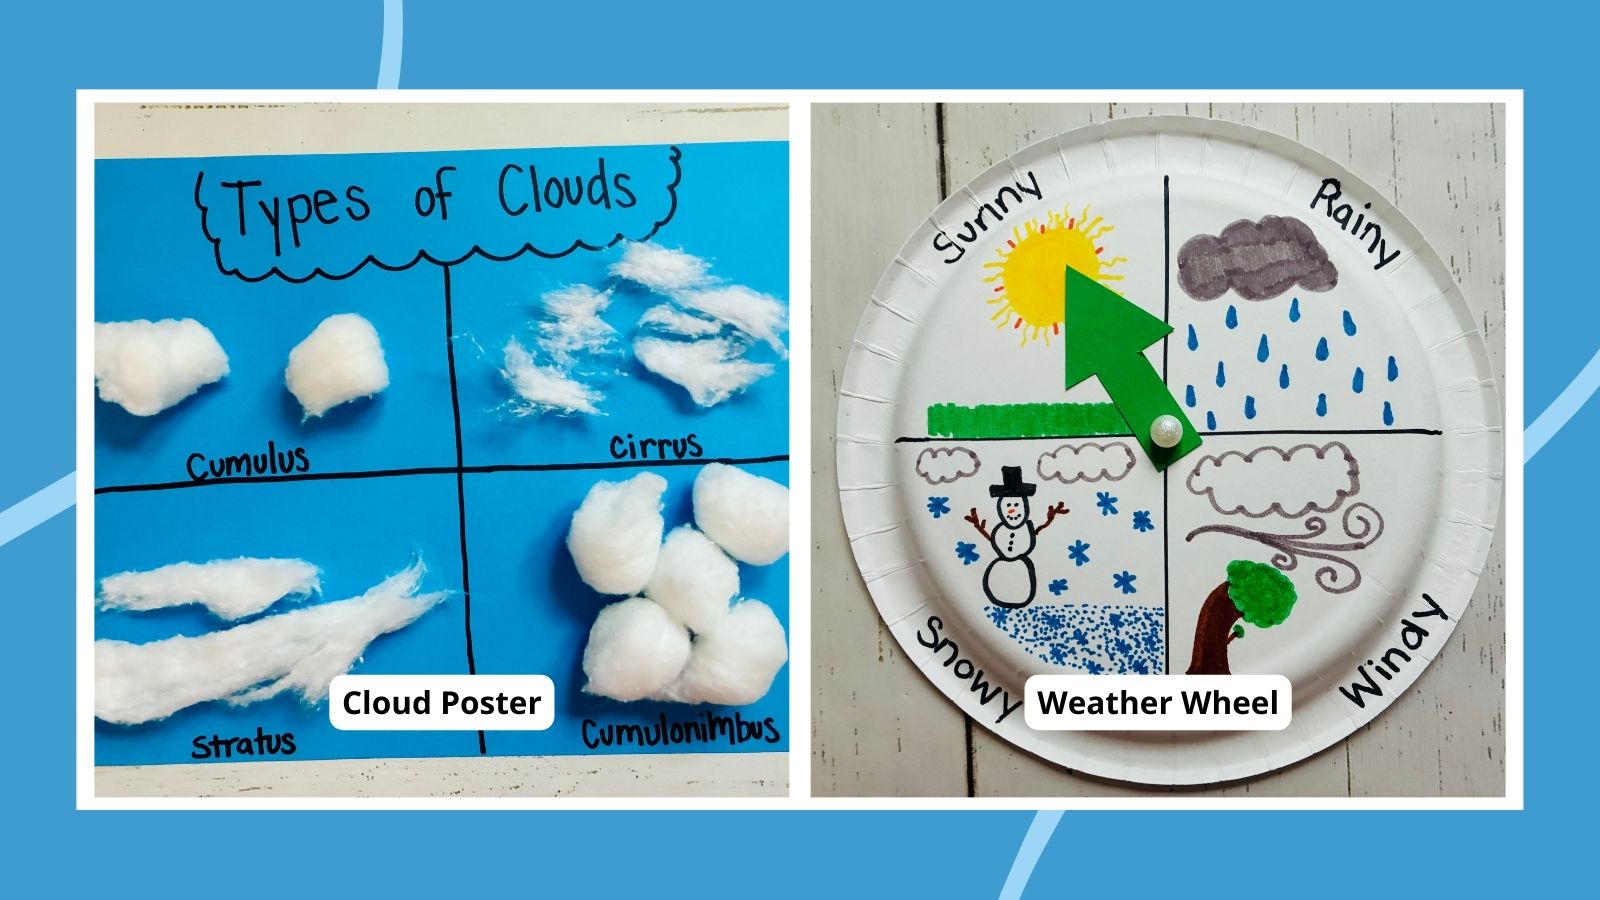
23. Make a cloud poster

What you need: Dark construction paper, cotton balls, black markers, glue
This is a fun hands-on way to learn about clouds. To begin, you’ll need an information poster or projected website that shows different types of clouds—cumulus, cirrus, stratus, etc.—as a reference model. Referring to the model, students will create their own versions of each cloud by gluing manipulated cotton balls onto the paper. Then they will label and write a few facts about each cloud.
24. Craft a wind vane
What you need: Paper cup, pencil, straw, straight pin, paper plate, construction paper scraps
For centuries, wind vanes have been used to detect the direction of the wind. To make your own, turn a paper cup upside down and poke a sharpened pencil down through the middle. Next, poke a straight pin through the center of a plastic straw and connect the straw to the eraser end of the pencil. The straw will be perpendicular to the pencil. Finally, use scissors to cut two small slits at one end of the straw. Insert a rectangle of construction paper into the slit. The straw will look a bit like an arrow. Finally, with a marker, divide the bottom of a paper plate into four quadrants and label them N, S, E, and W. Glue the paper cup weather vane to the top of the plate.
25. Measure rain volume
What you need: One 2-liter bottle, Sharpie, stones, water, scissors, ruler, tape
Create your very own rain gauge! Start by cutting away the top third of the 2-liter plastic bottle and put it to the side. Pack a few stones into the bottom of the bottle and pour in enough water to cover them. Stick a plastic ruler into the center of the rocks and make a note of what the current water level is. Invert the top of the bottle (which you cut off in the first step) and place it in the top to act as a funnel. Leave the bottle outside to capture and measure the rain.
26. Create art with the power of the sun
What you need: Photo-sensitive paper, various objects such as leaves, sticks, paper clips, etc.
Make beautiful nature prints using the power of the sun. Place the photo-sensitive paper, bright-blue side up, in a shallow tub. Place objects you wish to “print” on the paper and leave it in the sun for 2 to 4 minutes. Remove the objects from the paper and the paper from the tub. Soak the paper in water for 1 minute. As the paper dries, the image will sharpen, creating a pretty picture to display.
27. Measure atmospheric pressure with a DIY barometer
What you need: A dry, empty frozen-juice can or coffee can with lid removed, latex balloon, rubber band, tape, two drinking straws, card stock
Cut off the stiff band of a balloon, then stretch the balloon over the top of the juice or coffee can. Secure a rubber band around the balloon to hold it securely. It will look like a homemade drum. Tape the end of a drinking straw perpendicular to the center of the balloon surface, making sure it hangs off to one side. Fold a piece of card stock in half vertically and make hash marks every quarter inch. Set the DIY barometer right next to the measurement card. As the external air pressure changes, it will cause the balloon to inflate or deflate a little bit. The tip of the straw will move up or down accordingly. Take pressure readings five or six times a day.
28. Make a colorful weather wheel

What you need: Paper plates, brads, markers, construction paper
Give each student a paper plate. With a marker, have them mark the center point and draw lines dividing their plate into quadrants passing through the center point. In each quadrant, have students draw a different weather scene—sunny, rainy, snowy, and windy. Finally, cut an arrow out of construction paper and attach it to the center of the plate. Each day when they check the weather, students can adjust the arrow on their weather wheel.
29. Make a DIY thermometer
What you need: Wide-neck clear plastic bottle, water, rubbing alcohol, clear plastic drinking straw, modeling clay, food coloring
Fill the bottle about one-quarter full with equal parts water and rubbing alcohol. Add a few drops of food coloring. Mold the modeling clay into a thick disc shape and make a hole in the middle with a sharp pencil. Push the straw through the hole and place the whole thing over the top of the bottle. Squeeze the clay to form a tight lid, making sure the straw does not touch the bottom of the bottle. To test your thermometer, hold your hands on the bottom of the bottle and watch the mixture move up through the straw. Why? Liquid molecules expands when warm!
30. Evaporation experiment
What you need: Cups and water
Label and leave out cups of water in different spots in the classroom. For example, in the sun, in the shade on the windowsill, outside the window. Keep an eye on them for a few days, then measure which evaporates fastest.
31. Orchestrate a storm soundscape
What you need: Various musical instruments
Gather together a collection of instruments or classroom objects (for instance, rain sticks, drums, foil, fans, blocks, cups, etc.) and pass them out. Call out different types of weather (thunder, rain, wind, tornado, etc.) and see what sounds your students come up with.
32. Graph the weather
What you need: Paper, pencil and/or markers
Take your daily weather report and turn it into a math lesson! Experiment displaying your weather data in different forms—line graph, bar graph, pie chart, etc.
33. Create a rainy art project with salt

What you need: Paper, watercolors, salt
Have students paint colorful rain scenes using watercolor paints. Then, while the paint is still wet, sprinkle salt to create “raindrop” textures. Display your beautiful rainy day paintings in the hall or in your classroom.
34. Make a weather collage
What you need: Magazines, paper, glue
Provide magazines for students and allow them to cut out images of different pictures of weather—sun, clouds, rain, etc. Then have them glue their pictures onto a piece of construction paper, creating a collage that transitions from sunny to stormy.
35. Go on a weather scavenger hunt
What you need: Paper and weather clues
Take your kids outside and go on a weather scavenger hunt. Create a list of clues and include items such as “something blown by wind,” “a reflection of the sky,” or “a shadow.”
36. Make wind chimes
What you need: Plastic cups, hole punch, string
Give each student a plastic cup (such as a Solo cup) with a hole pierced through the bottom. Instruct students to use a hole punch to punch five to eight holes just below the rim of their cup. Then, have them tie equal lengths of string or yarn to each hole. Have them create a loop out of another piece of string and tie a knot at the end. Thread the loop through the hole in the center to act as the hanger. Set out a collection of art supplies such as beads, shells, pasta tubes, pebbles, etc., and let students choose what they like to tie onto the end of each string. Next time you have a windy day, take your students outside with their wind chimes and listen to the musical sounds they make.
37. Write weather stories
What you need: Paper and pencil
Come up with a list of titles for weather stories to spark your students’ imaginations. Suggestions: “The Day the Sunlight Slept In,” “The Storm That Stole My Homework,” “The Boy Who Caught the Breeze.” Brainstorm together or search online for other fun titles.
38. Write weather poetry

What you need: Paper, pencil and/or markers
What a lovely topic to write poetry about! Give students the opportunity to write haiku or acrostic poems using weather words. Make sure they include descriptions and sensory details.
39. Play weather bingo
What you need: Bingo cards, bingo card markers
Create bingo cards using weather vocabulary such as “humidity,” “front,” “gust,” “dew point,” and “forecast.” Call out clues or definitions and have students call out the answer before marking their cards. See who can score bingo first, then have students trade cards and play another round.
40. Make your own sun prints
What you need: Color construction paper, small objects
Show students how sunlight can create art with easy sun prints. All you need is sun print paper or construction paper, a few small objects like leaves or classroom supplies, and a sunny spot. Kids arrange their objects on the paper and leave it in the sun. As the light hits the paper, the exposed areas fade while the covered shapes stay dark, revealing a clear print. It’s a simple way to explore how the sun’s energy affects materials and a great hands-on connection to weather and seasons.
Grab your free science experiment recording sheets!

Get your free printable science experiment recording sheets today! Just click the link below and your download will be available right away.