As a teacher, you probably know about Google Docs. You’ve probably even been using pieces of it for years! But there’s a lot more to it than just sharing documents and having an easy, cloud-based solution for your classroom. Over the years, I’ve gotten to learn about some pretty sweet features that have made my life as a teacher easier. These functionalities are built into Google Docs, and they are fantastic. Even though they might not be on your radar, take a look. You’ll be glad you did!
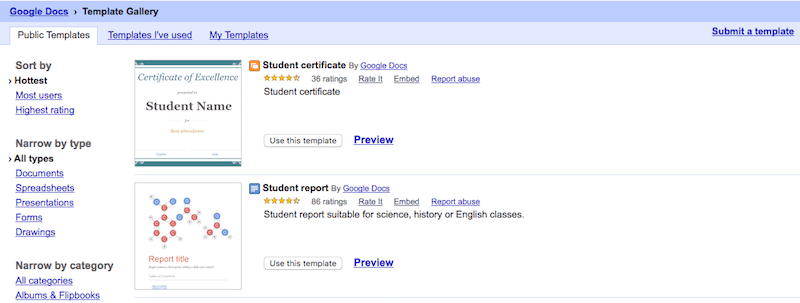
1. Template Gallery
Why start from scratch when you could use a well-designed template? Whether you want to use Google Docs to draft your course syllabus, design a student certificate, formalize teaching notes, or plan a project for students, it’s almost for sure you can find a template for that. Template Gallery is the place to go. In fact, there are hundreds of beautiful templates here for you to choose from. You can preview a template or use it directly, and it will open as a new file in Google Docs. This feature is often overlooked but isn’t exactly hidden.
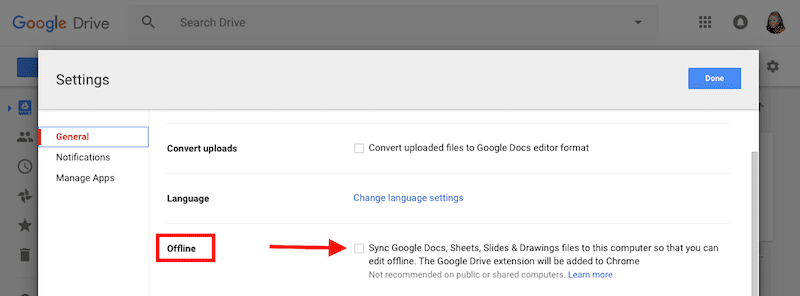
2. Offline Editing Mode
How many times you are working on a Google document and you can’t type anymore because it says there is no Internet connection? What if you can still create, edit or view files even if you aren’t connected? Introducing offline mode—a feature that allows you to save a copy of your edited documents on your computer and sync when you are back online. To enable offline mode, all you have to do is check this option (see the screenshot above) and click Done to continue. Note: offline access is only available in Chrome web browser, according to Google.
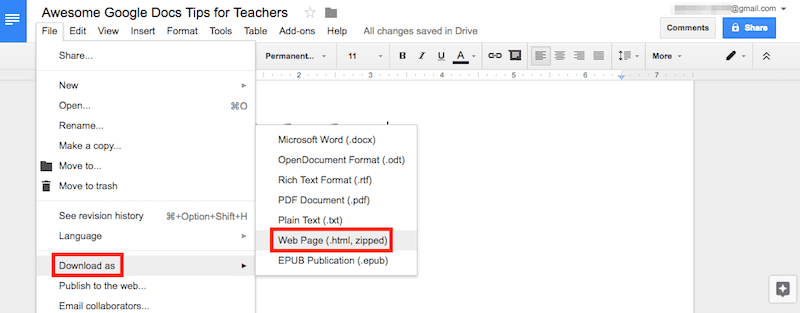
3. Extract Images in Batch
Despite being the most powerful online word processor, Google Docs doesn’t make it easy for users to directly save images embedded in the content (nope, copy and paste doesn’t work in most cases). So if you want to reuse lots of images in a Google document, it can be cumbersome to extract them one by one. But there is still a way to get this done a lot quicker. On the menu, select File > Download as > Web page (.html, zipped), a zip file will be downloaded. Double-click to open it, and you’ll see a folder called “Images.” Yep, all images should be there. Courtesy to SoftwareHow for this fantastic tip.
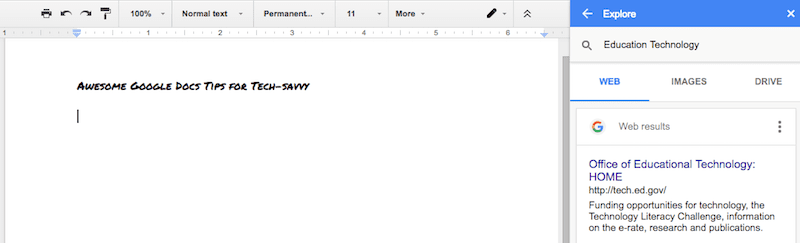
4. Research via Explore
For those who don’t know, back in September, the official Google Docs blog announced several updates, one of which was the old Research tool being replaced by Explore. You can access the feature via Tools > Explore, or click the Explore icon at the bottom right of any documents. Just type a keyword in the search box, alternatively, you can highlight a few words in your document, right click and select “Explore ‘(highlighted words)'”, then you’ll see a list of resources showing up. These include web results and images. You then can add or insert those results you like for reference. For web results, you can “cite as footnote” and the Explore tool allows you to change citation format (MLA, APA, Chicago).
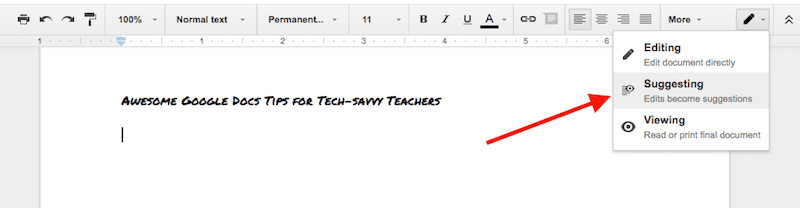
5. Suggesting Mode
While the ability to directly edit or make changes in a Google document is great, it is sometimes rude to change others’ text. There are times (for example, when you and your students are collaborating on a project or doing peer evaluation) you may only want to suggest changes—without actually making any, unless the person accepts the changes. That’s what Suggestion Mode has to offer. To enter the mode, first look in the toolbar with an editing pencil icon, click on the arrow next to the pencil icon and select “Suggesting.” Only the author of the document has the power to approve or disapprove any suggested changes.
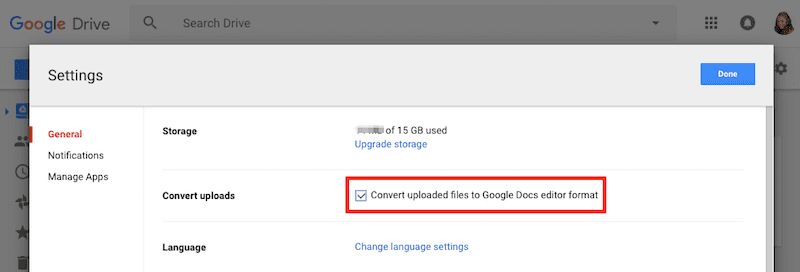
6. Make PDF files (even scanned) editable
PDFs offer many advantages over other file types, but they are not easy to work with because PDFs are essentially images and they are much restrictive. Scanned PDF files are even harder to handle. Chances are you’ll have to convert them into editable texts. Thanks to Optical Character Recognition, a technology built in Google Docs, allows you to convert PDFs and images into pure text formats. On Google Drive Settings, simply check the option called “Convert uploaded files to Google Docs editor format,” and you’re ready to go. I discovered this technique while exploring guides to convert PDF to Word on Mac.
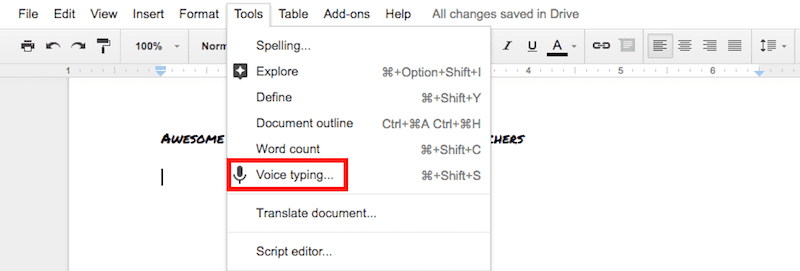
7. Voice Typing
Google Docs also supports voice typing. All you need is the Chrome browser and a working microphone built into your computer or connected externally. To get to voice typing, open a document, on the menu, select Tools > Voice typing. Select the language you’ll speak (by default, it’s English). When you are ready, click on the microphone image to enable the voice recognition. Click on it again to toggle it off. Although I feel it’s a little bit like talking to a robot, I love the feature and hope you do, too.
8. Create Your Own Shortcuts
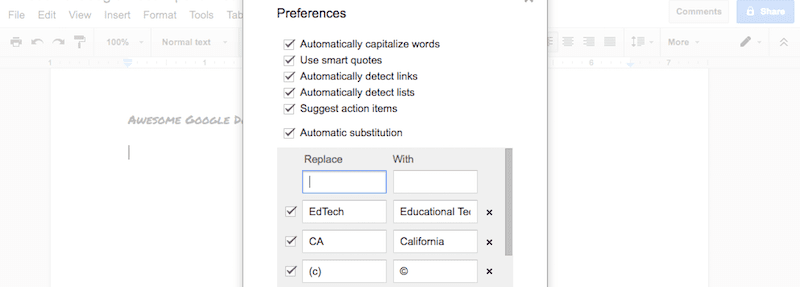
Google Docs have already provided a number of shortcuts for us (like changing (c) to ©), but what if you want to make a few of your own? For instance, it might be a good idea to add frequently misspelled words, mimic popular text expansion applications, or autocorrect your errors without running a spell check. You can do all of those via Google Docs Preferences (Tools > Preferences > Automatic substitution). Just fill in the “replace” and “with” blanks and you are good to go.
9. Image Editing
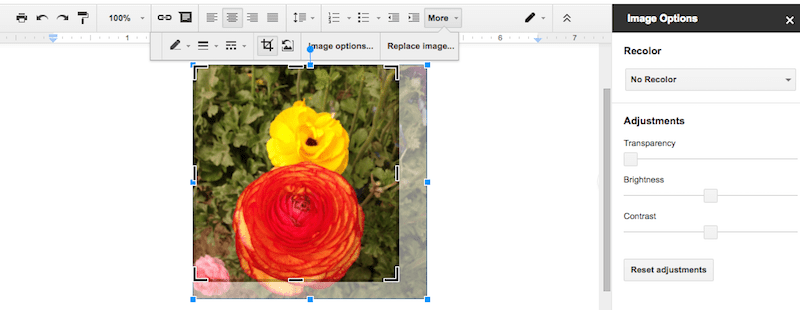
Normally you have to rely on third-party tools to edit an image, such as crop it, add colorful borders or adjust transparency, etc. But in Google Docs, you can do all of these without leaving the app. Once you insert an image (from the menu, or just drag and drop it) and select it, you’ll see an editing toolbox becoming available on the menu. To crop an image, select it in your document and click the crop icon in the toolbar. From there, drag the blue handles to your desired locations and hit “Enter” on your keyboard. The Image Options are also very useful, and they allow you to recolor and adjust transparency, brightness, and contrast. Don’t forget that you can reverse any operations by clicking the “Reset Image” icon and this will restore the image to its original state.
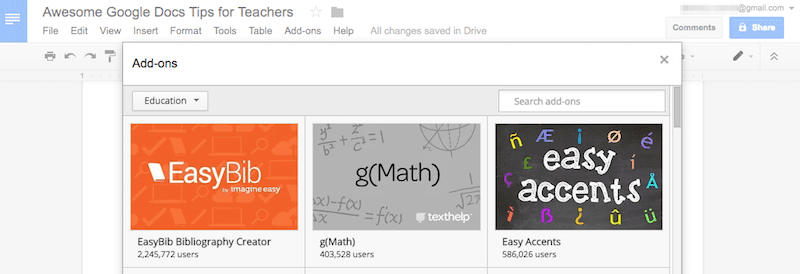
10. Browse Education Add-ons
Google Docs offer tons of basic word processing and editing functions, but it’s unrealistic to integrate all tools and features to the menu. What’s the solution? The Adds-on is a place for those whose needs stretch beyond the most basic functions. To access the Adds-on Store, click Add-ons > Get Add-ons from the menu. Select “Education” from the dropdown list; you’ll be surprised with the massive extensions you can use, most are free. For example, EasyBib Bibliography Creator allows you to generate citations quickly. Easy Accents is a great tool to insert accents for different languages directly from the sidebar in Google Docs.
What are your Google Docs tricks?