
Multiplication is a big step forward for kids learning arithmetic, but in many ways, they’ve been preparing for it since they started learning to add. After all, multiplying is just a more efficient form of repeated addition. To truly help your students master this skill, it’s important to use multiplication games and activities that emphasize both fact fluency and deeper understanding. Check out this collection of ideas to try in your classroom.
- Multiplication Games
- Hands-On Multiplication Activities
- Active Ways to Practice Multiplication
- Creative Ways to Teach Multiplication
- Multiplication Facts Practice
Multiplication Games
Who Am I?
- Divide students into pairs, and give each pair a shuffled deck of multiplication flash cards.
- Player one picks a card from the deck without looking at it, and holds the card up to their forehead with the fact side showing.
- Their partner tells them the product for the card, and the player tries to guess the fact.
- Example: Player one picks up the card that says “3 x 4.” Their partner says “You’re 12.” The player guesses “2 x 6,” and the partner responds, “Nope! Guess again!” Continue until the player guesses the correct fact.
- Players switch roles and repeat.
- To make it competitive, keep track of how many guesses it takes each player to get the correct fact on each round.
Tower of Facts
- Use an old Jenga set or pick up a generic one at a dollar store. On each block, use a permanent marker to write a multiplication fact (without the answer).
- Set up the game as usual. As players pull blocks from the tower, they must answer the multiplication fact on the block.
- If they are correct, they set the block aside, without needing to stack it on top.
- If they’re wrong, they stack the block on top.
- Play until the tower falls!
Challenge Roll
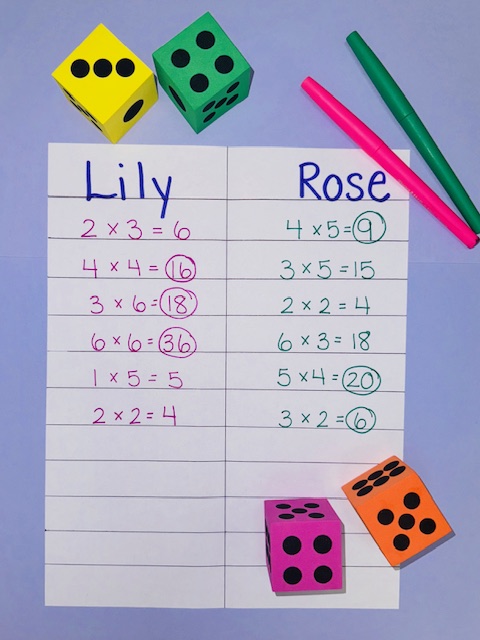
- Partner students up. Give each group a pair of dice, a pencil, and a piece of paper. Fold the paper in half vertically and write one player’s name at the top of each column.
- Player one rolls the dice, multiplies the numbers, and writes the equation and its product in their column. Player two does the same. Compare the two products, and circle the largest number. That player wins the round.
- Continue for at least 10 rounds, or longer if you like. Count up the individual round wins to find the ultimate winner.
Teacher Tip: Use polyhedral dice to practice multiplying higher numbers.
Multiplication Mix-Up
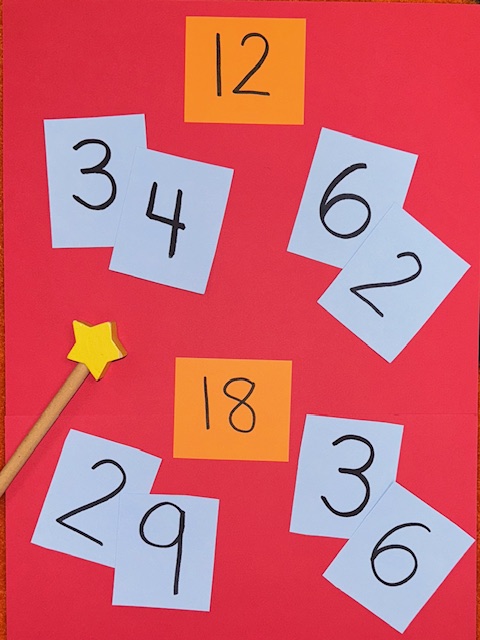
- Provide each player with cards numbered 1 to 12, ensuring they have at least three of each digit.
- Call out a product (e.g. “24”). Players have one minute to create pairs of cards that can be multiplied to make that product. In this example, kids should lay out 2 and 12, 3 and 8, and 4 and 6.
- Check answers, and share all the correct combinations. Players earn one point for each fact pair they get right, then shuffle their cards for the next round.
- Repeat as many times as you like, then total up the points to find the winner.
Domino Battle
- Students can play this multiplication game in partners or small groups. Give each group a bag of dominoes.
- Start the first round by having each player draw a domino and lay it on the table in front of them. Multiply the two dot arrays for each to discover which player has the largest number. They keep all the dominoes for that round.
- Continue with new rounds until all the dominoes are gone, then count up individual domino piles to find the winner.
Teacher Tip: Play for the lowest product instead of the highest in each round for a fun twist!
Race to 100
This classic math game works with any type of equation, and our free printables make it easy to play! Kids write down a series of multiplication equations, working toward an exact total of 100. Get the full instructions and free printables to try this game for teaching multiplication at the link.
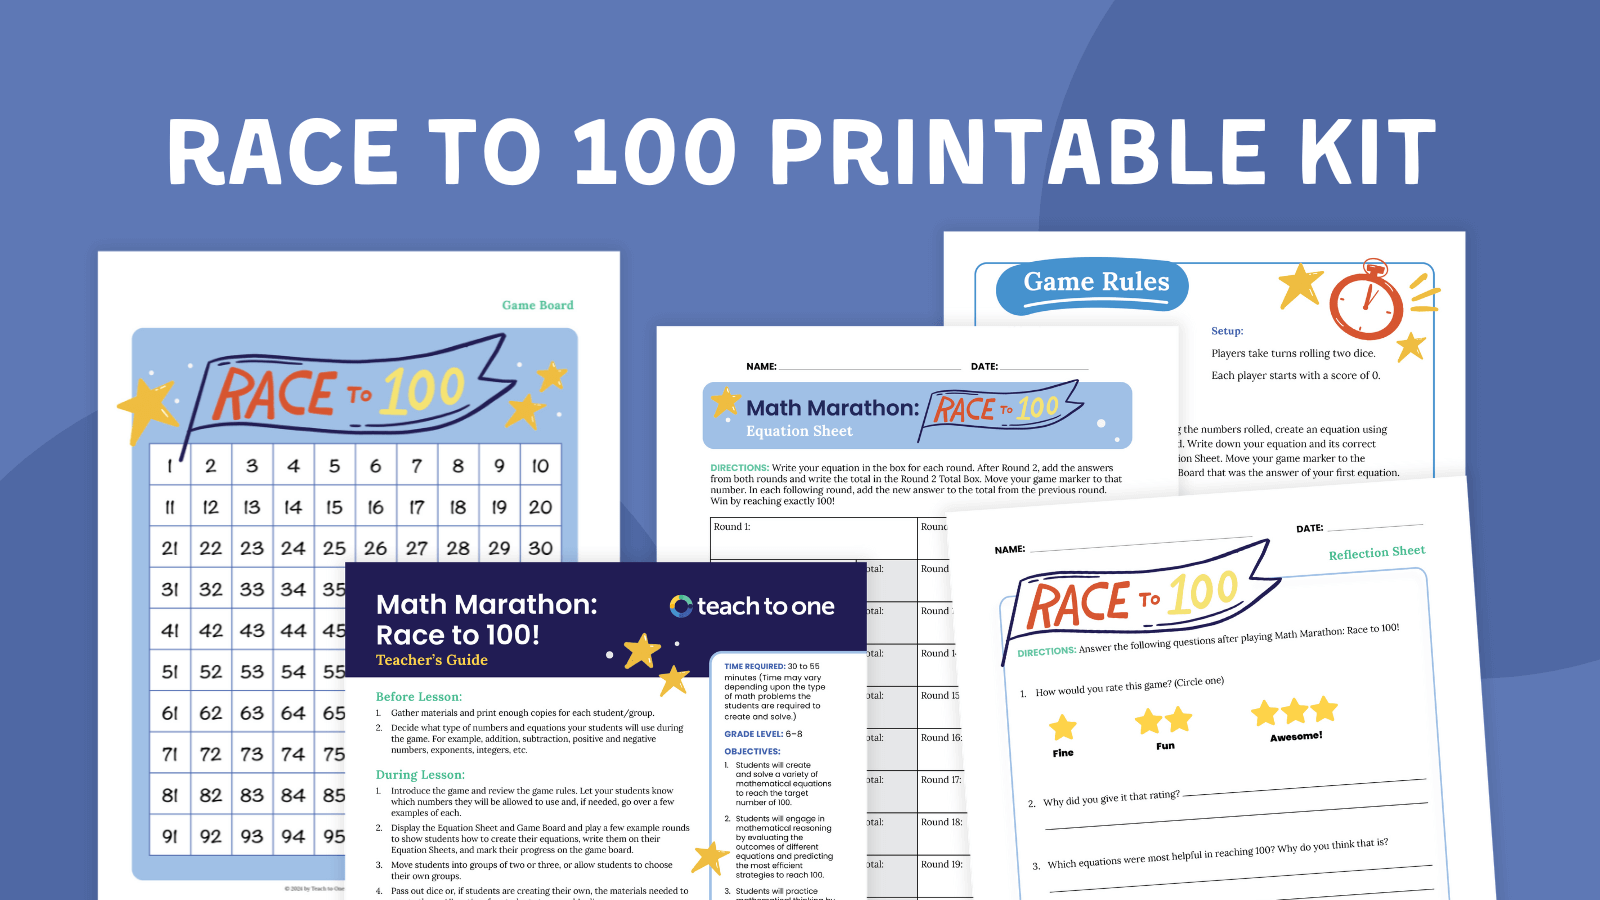
Instructions, game boards, worksheets, and even a debrief page. Download your free set now!
Cover Up
- Partner students up. Give each partner a different color of pencil or marker, and a piece of graph paper for their playing board. They’ll also need a set of dice.
- Player 1 rolls the dice, then creates an array on the board for their fact. For instance, if they roll a 6 and a 5, they could outline a box that’s 6 squares across and 5 down, or vice versa. In the center, they write the product (30).
- Player 2 takes a turn. Their box cannot overlap the other player’s.
- Continue until there’s no more room on the board for a player’s roll. You can find the winner in one of two ways:
- The last player able to outline an array on the board is the winner OR
- Tally up each player’s products. The person with the highest total wins.
Squeeze
- Play this game in partners or small groups. Shuffle a set of multiplication fact cards. Lay two cards out on the desk to create the start of a number line. Leave space between them for more cards.
- Example: The two cards pulled are 2 x 5 and 6 x 4. This round’s number line stretches from 10 to 24.
- Deal each player 10 cards. Player one flips their first card and answers the equation. If the product fits into the number line, they place it in the appropriate place in the middle. Otherwise, they must keep the card.
- Example: If the player flip 2 x 11, the total is 22 and they place the card just to the left of the 6 x 4 (24). If they flip 6 x 8, the total (48) is too high to fit the number line, so the player keep sthe card.
- Repeat, with each player taking turns until they’ve tried to fit all their cards in the line. At the end, the player with fewer cards left in their hand wins that round.
Teacher Tip: Add a challenge to this one by not allowing any repeats! If the product you want to place is already in the line, you’re out of luck and have to keep it.
Whack That Fact!
- Write 15 to 20 multiplication products on the board. Divide the class into two teams, and give each team a flyswatter.
- Each team sends one player to the board. Call out a multiplication fact. The first player to “whack” the correct product with their flyswatter wins the point.
- Repeat until every player on both teams has had a turn, then tally up the points to see who wins.
Multiplication War
- Divide students into partners, and give each a deck of cards. Shuffle the deck and divide it evenly between the players. For the purpose of the game:
- Jacks = 10
- Queens = 11
- Kings = 12
- Aces = 0
- At the same time, each player flips the top two cards from their deck. Multiply each pair to get the product. The player with the highest product wins that round and keeps all the cards.
- Continue until one player has won all the cards!
Spinner, Spinner, Multiplication Winner
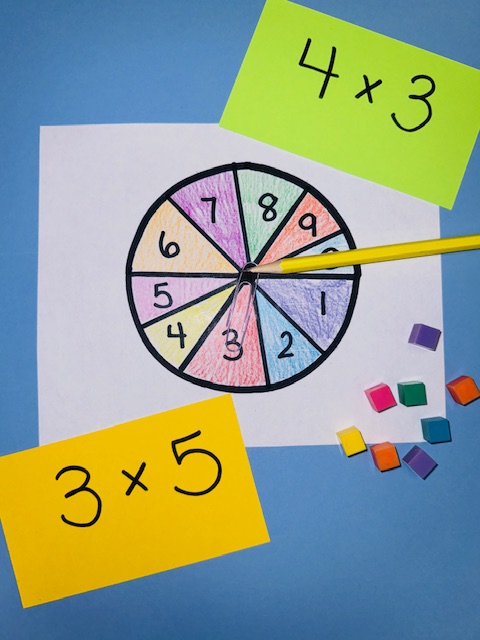
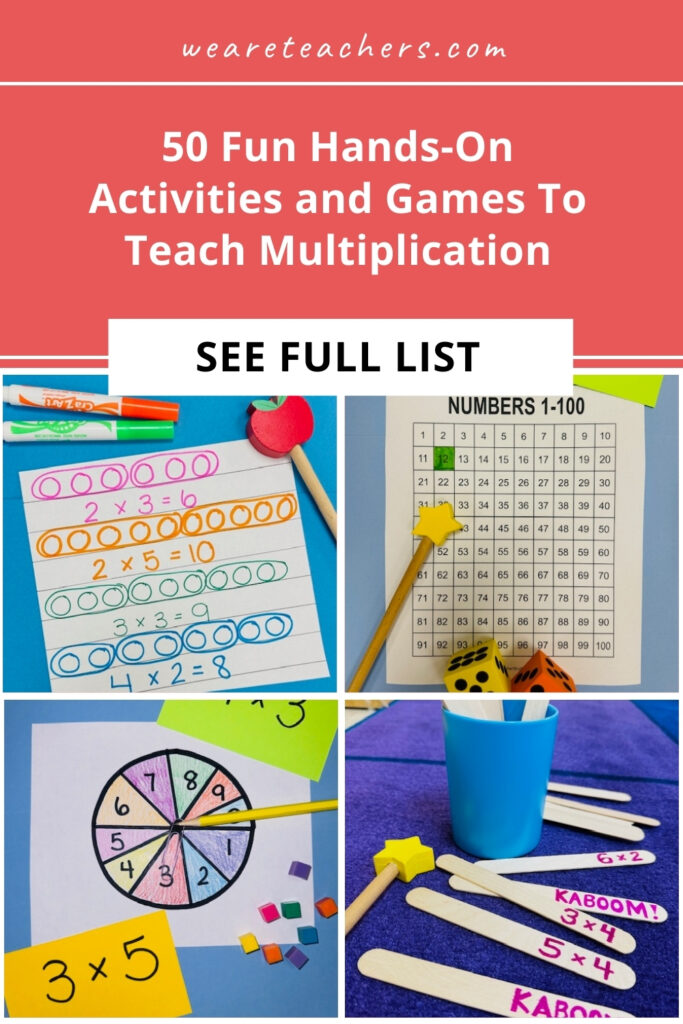
- Give each player a multiplication spinner board, a pencil, and a paperclip. (You can use our free printable boards, or make your own by tracing a circle then dividing and labeling it as shown in the picture.)
- Players take turns holding the paperclip in place with the pencil and spinning it around the point twice. They each write down their two numbers and the product. The player with the highest total product wins the round and gets a point.
- Play at least 10 rounds, then tally the points to find the winner.
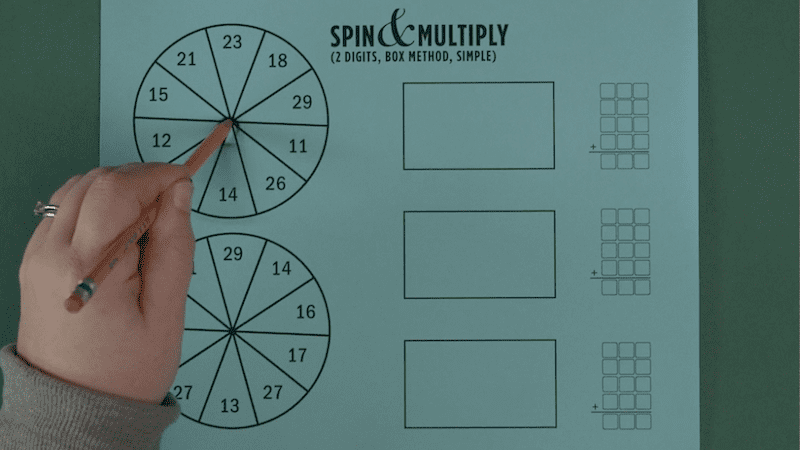
Multiplication Spinner Games (Free Printables)
Add a pencil and paperclip, and you’ve got simple spinner games for multiplication practice!
Multiplication Concentration
- Write one multiplication fact (no answer) a notecard, and its corresponding product on another card. Make as many of these as you like.
- Shuffle the cards and lay them face down on the table.
- Students take turns flipping two cards to see if the fact and product match. If they do, they keep the cards and take another turn. If not, it’s the next player’s turn.
- Play until all the cards are matched up, then count the cards to find the winner!
Flashcard Race
- Kids race against themselves in this multiplication game! Start by selecting 10 multiplication fact cards to practice. Shuffle them and lay them in a stack.
- Start a timer, and begin pulling cards. Answer each correctly as fast as you can. You can’t move on to the next card until you get the previous one right.
- Stop the timer when you’ve finished the stack, and record your time. Then, shuffle the cards and try again—see if you can beat your first round score!
Teacher Tip: You can also play this game by giving players 60 seconds to answer as many facts correctly as they can.
Kaboom Sticks
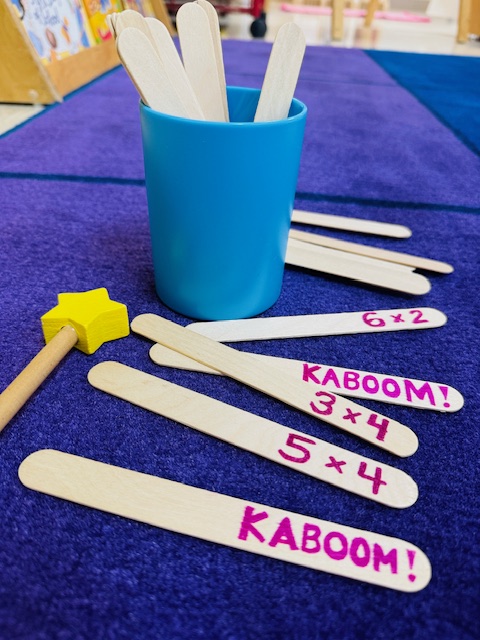
- Write math facts on the ends of wooden craft sticks. Mix a few sticks saying “Kaboom!” into the pile. Place the sticks in a cup or can with the fact side down.
- Players take turns pulling a stick and answering the math fact. If they get it right, they keep the stick. If they’re wrong, they have to put it back.
- If a player draws a “Kaboom!” stick, they must put all their sticks back!
- Continue until all the sticks are used up. Then count up the totals to see who has the most.
Hands-On Multiplication Activities
Multiplication Model Make-It
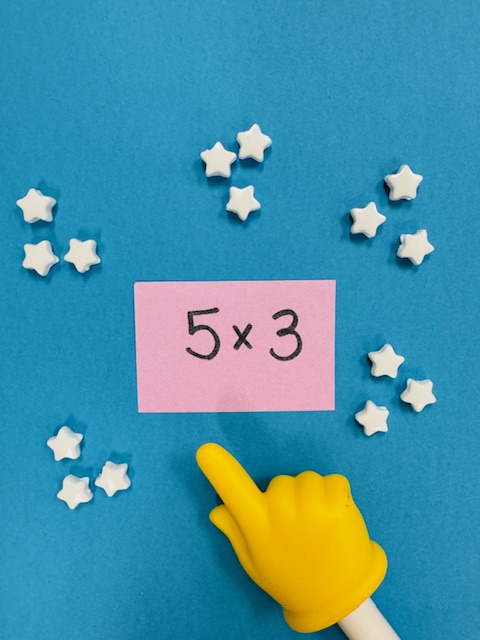
- Provide each student with a set of small manipulatives such as cubes, counters, beads, etc.
- Give them an equation—you can say it out loud or write it on the board—and ask them to arrange their manipulatives to represent it.
- For instance, for 3 x 7, they could make 3 rows or piles of 7 items each.
Teacher Tip: Dried beans are terrific math manipulatives, and cheap too!
LEGO Brick Multiplication
- Give each student a handful of LEGO bricks.
- Kids count the number of dots across and down each brick or place, then multiply them to find the total. Have them draw each brick, then write out the multiplication fact and answer.
Teacher Tip: This hands-on activity is self-checking, too, since kids can simply count up all the dots one-by-one to check their answer!
Sticky Dot Flash Card Challenge
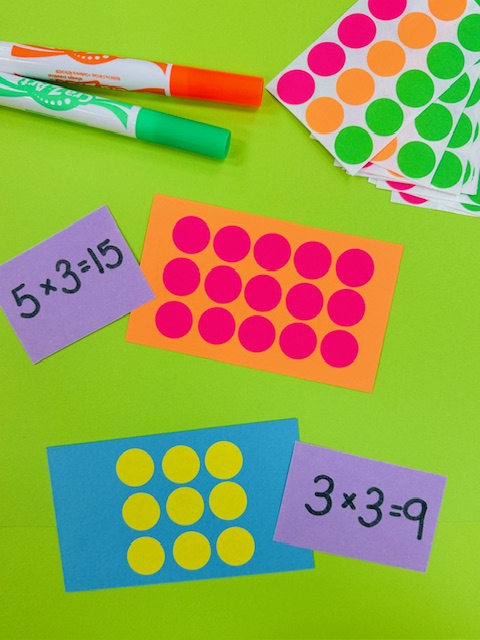
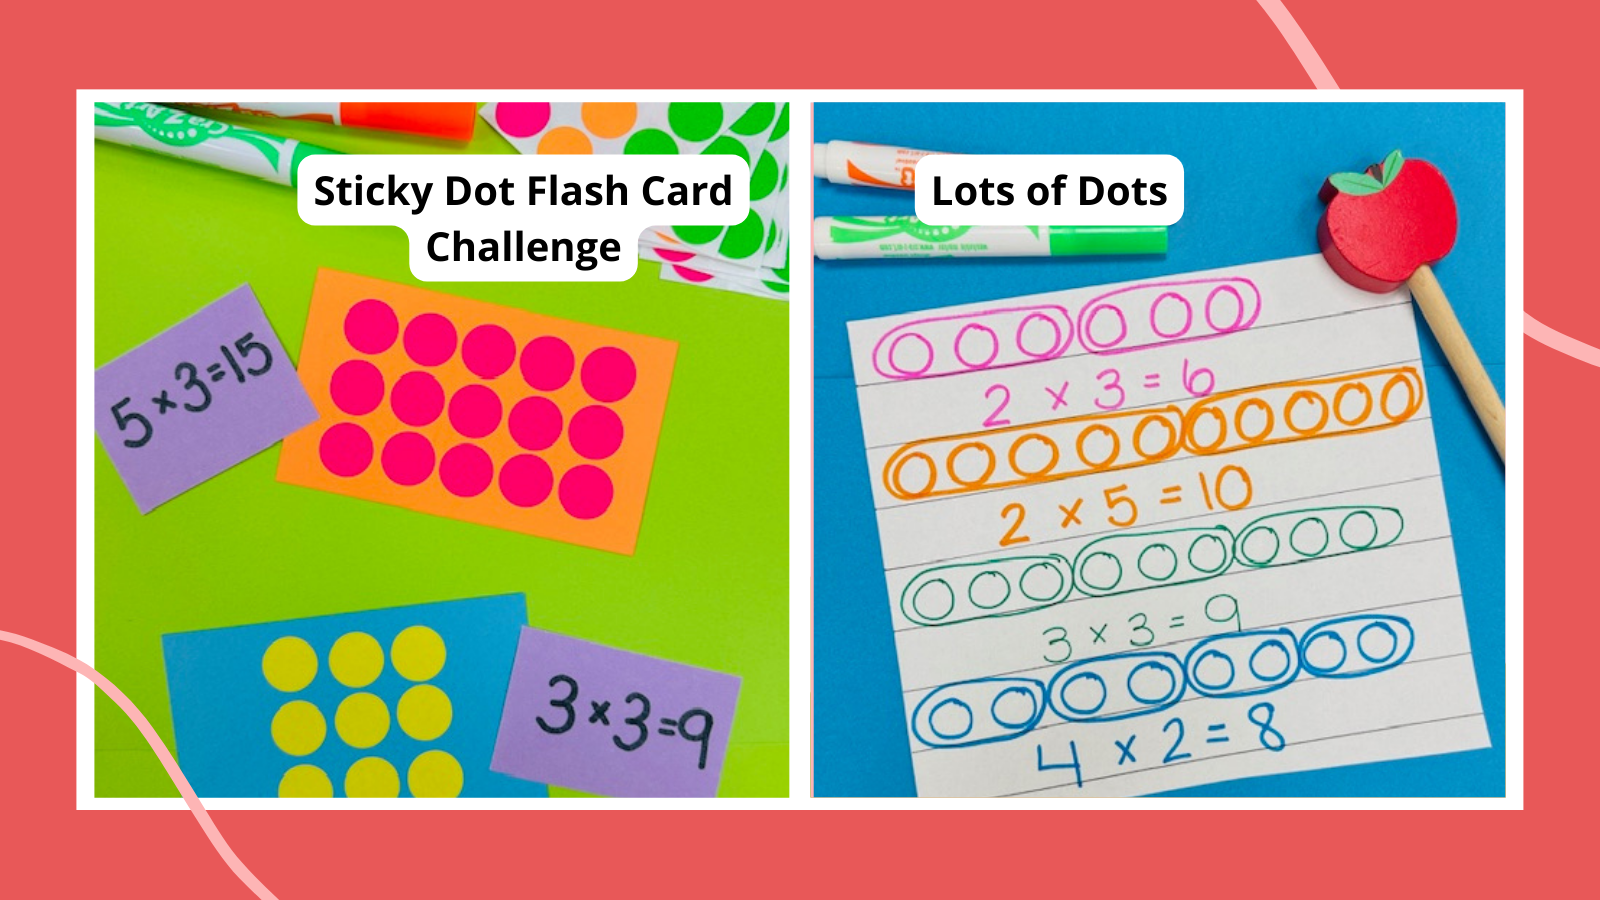
- Students can make their own area model multiplication array cards to use for games or practice! All you need are notecards and colorful dot stickers. Have them write a multiplication fact on one side of the card, and the dot array that represents it on the other.
- Then, try this fun partner game. One student flashes the dot side of a card for the other student to see, but only for a couple of seconds. The second student tries to guess the fact it represents.
Teacher Tip: This is great subitizing practice too!
Multiplication Shake
- Create a DIY multiplication shaker with an empty egg carton and a couple of dried beans. In the bottom of each section, write a number from 1 to 12.
- Place two beans in the carton, then close it and give it a good shake.
- Open the carton to see which two numbers the beans landed on. Write out the equation and answer, then shake it up and play again.
Teacher Tip: This is a really fun idea for math learning centers!
Hole Punch Multiplier
- Give students colorful paper, blank white paper, a hole punch, a glue stick, and a pen or pencil.
- Provide a list of multiplication facts to work with. For each one, kids the equation on the white paper, then punch colorful paper dots and arrange them to form an array representing the fact.
- Glue the dots in place, then move on to the next one.
Lots of Dots
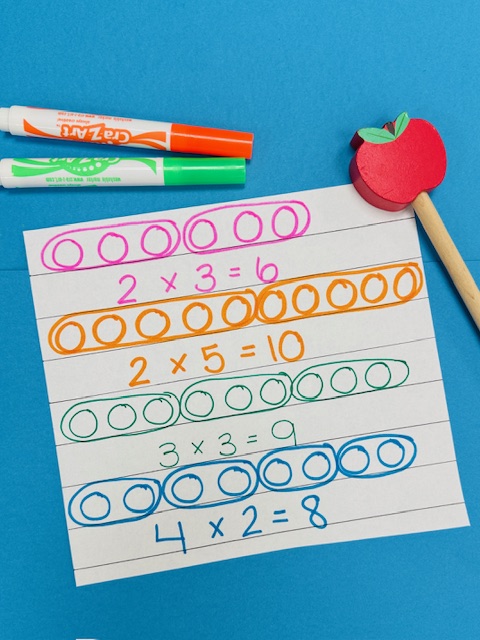
- Start by having students make a row of dots on a piece of paper with a pencil or marker, according to the target number you give them.
- Ask them to circle groups of dots to create a representation of a multiplication fact with that product.
- For instance, if the target number is 12, students might circle 3 groups of 4 dots, or 6 groups of 2 dots, etc.
- Then, have them write the whole equation under the row of dots. Repeat with as many target numbers as you like.
Addition and Multiplication Scramble
- Use sentence strips (or other long strips of paper) to write repeated addition sentences like 5 + 5 + 5 + 5 or 2 + 2 + 2.
- Make corresponding notecards with the multiplication facts, like 4 x 5 or 3 x 2.
- Mix these up in a big pile, then have students sort through them and pair up the repeated addition sentences with the matching fact cards.
(Cl)arrays
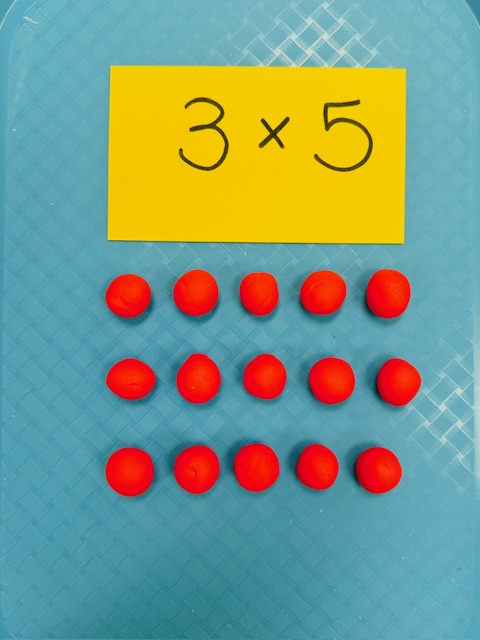
- Give each student some playdough or modeling clay and a list of multiplication facts
- Ask kids to roll and arrange balls of clay to represent each one in an area model array. Simple, but so fun!
Teacher Tip: Clay + arrays = (Cl)arrays!
Rubber Stamp Multiplication
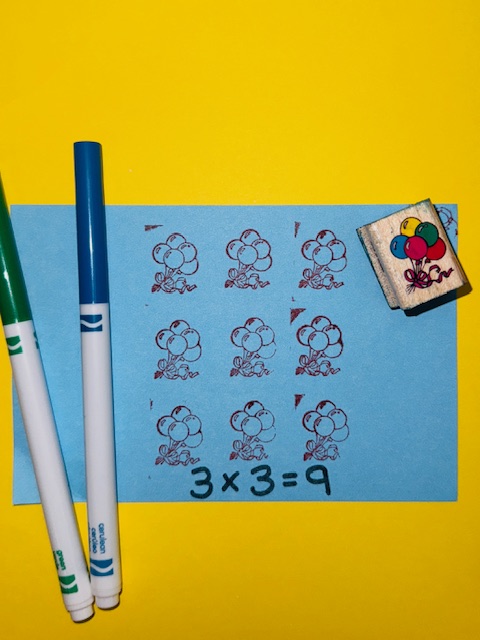
- Provide rubber stamps, an inkpad, notecards, markers, and a list of multiplication facts.
- On each card, have students write a fact, then use the rubber stamps to make an array that represents the equation.
Teacher Tip: Small rubber stamps work best for this. Be sure the ink is washable!
Multiplication Four Square
- Fold a piece of paper in half horizontally and vertically, then open it to show four sections.
- Assign each student a multiplication fact, and have them fill in each section as follows:
- Upper left: Fact and answer (5 x 8 = 40)
- Upper right: Repeated addition (8 + 8 + 8 + 8 + 8 = 40)
- Bottom left: Area model array (5 rows of 8 dots each)
- Bottom right: A word problem (If 5 hens each have 8 chicks, how many chicks are there altogether? Answer: 40.)
Teacher Tip: These make terrific wall or bulletin board displays!
Active Ways to Practice Multiplication
Flashcard Relay Race
- Divide the class into two or more teams. At one end of the room, place a stack of multiplication fact flashcards for each team.
- When the race starts, the first player runs to the other end of the room and picks up the first card.
- If they answer it out loud correctly, they carry it back to the other end, tag the next runner, and go to the back of the line.
- If they get it wrong, they place the card on the bottom of the pile, then run back to the end of the line and tag the next runner.
- Play continues one team has correctly answered all their flashcards and carried them back to the start point, winning the game.
Multiplication Ball
- Blow up a beach ball and write a variety of math facts (no answers!) all over it.
- Toss the ball to a student, then look for the equation that’s the closest to their right thumb.
- If they can answer it correctly, they stay in the game and toss to another student.
- If not, the player sits down.
- Keep playing until there’s only one student left standing.
Teacher Tip: Identify the trickiest multiplication facts, the ones your students miss the most often. Use them for this game for some fun reinforcement and practice!
Rock, Paper, Multiply!
- Students stand up and find a partner. On the count of 3, each player throws out a number of fingers on one hand. The first player to correctly say the product of the two numbers wins that round, and the other player sits down.
- The remaining players find a new partner and play another round. Keep playing until you have an ultimate winner.
Teacher Tip: As players get more skilled, have them play with two hands each to practice multiplying higher numbers.
Name Tag Facts
Give each student a name tag to wear with a different multiplication fact on each one. Then, call out specific instructions based on the products each fact represents, like:
- If your product has two digits, stand up.
- All facts whose products are even numbers, stand on one foot.
- If your product is more than 15, put your hands on your head.
This is a great way to burn off a little extra energy while you learn!
Multiplication Cup Towers
- Write multiplication facts on the sides of disposable cups, and stack them up.
- Students take turns pulling a cup from the stack. If they answer the fact correctly, they get to keep the cup and start building a tower. If not, it goes to the bottom of the stack.
- The ultimate goal is to build a pyramid of correct facts, with 3 cups on the bottom, 2 in the second row, and 1 on top.
- Play until one player completes a pyramid, or keep going until every player has finished one.
All Hands on Deck!
- Call a number of students to the front of the room, and ask them each to hold up a specific number of fingers. Example: Call up 4 students, and ask them to hold up 2 fingers each.
- Ask another student to identify the math fact the students represent, writing the equation and the correct product on the board.
- Switch to a new group of students, and repeat as many times as you like.
Tip: You can also let the groups you call huddle up and decide among themselves how many fingers they will throw out to model the next fact.
Number Line Hop
- Head out the playground and use sidewalk chalk to create a life-size number line from 1 to 100.
- Students line up and pull a card from a stack of flashcards. If they solve it correctly, they hop along to that number on the line.
- On each subsequent turn, students hop further along the line by adding the new product to the number they’re standing on.
- Example: On their first turn, a player pulls 4 x 5 and hops to 20. On their next turn, they pull 3 x 4 and hop to 32.
- The first player to reach 100 wins!
Teacher Tip: Students can play this game sitting at their desks too. Just use a hundred chart and have them move a counter along the board as they answer each fact.
Room Arrangement Multiplication Hunt
- Before class, arrange sets of materials to represent multiplication facts. Examples:
- 5 stacks of books with 4 books in each stack
- 3 piles of rulers with 8 rulers in each pile
- 9 index cards with 5 paper clips on each
- Give students clipboards with pencil and paper. Their job is to look around the room to find as many examples of multiplication facts as they can, writing down a description of the items and the equation. Set a timer, and watch them hunt!
- When the time is up, bring the class back together to share what they’ve found, and check their answers.
Teacher Tip: Students can work individually or in small groups for this multiplication activity.
Creative Ways to Teach Multiplication
Multiplication Clue Cards
- Give each student a few notecards with multiplication facts written on one side.
- On the back of each card, students write 3 clues to help others guess their facts. For example, if the fact is 3 x 3 = 9, they might write:
- Both factors are the same
- The product is an odd number
- The factors are less than 4
- Once each student has a set of cards, partner them up. Kids take turns reading each other their clues to see if their partner can figure out the facts.
Human Body Multiplication
- Call up a group of students to the front of the classroom, then ask questions like these:
- How many ears does this group have altogether?
- What’s the total number of fingers in this group?
- How many noses does this group have?
- Other students figure out the answer by writing a multiplication fact:
- 2 ears x 4 students = 8 ears total
- 10 fingers x 7 students = 70 fingers total
- 1 nose x 4 students = 4 noses total
- Change out the number of students and parts of the body for new facts.
Multiplication Masterpieces
- Provide students with paper and crayons, markers, or colored pencils.
- Give them a list of multiplication facts, and tell them their job is to draw a picture that includes representations of each of those facts.
- Example: If the facts are 4 x 8, 2 x 5, and 6 x 7, a student might draw a basketball game with 2 teams of 5 players each, 6 rows of 7 spectators each sitting in the bleachers, and concession stand selling 4 stacks of 8 candy bars each.
Teacher Tip: Let students choose their own facts to include, then trade pictures and see if their classmates can find all the respresentations in their masterpiece!
Clapping Facts
- Clap out a fact for students to figure out.
- Example: 7 x 2 = 14
- Clap, clap, clap, clap, clap, clap, clap (pause)
- Clap, clap, clap, clap, clap, clap, clap (stop)
- Example: 7 x 2 = 14
- Once students get the idea, let them take turns clapping out facts for others to guess.
Tip: Write the facts on the board as you go to avoid any repeats.
Multiplication Museum
- Break students into small groups and provide each with a variety of small manipulatives like chips, cubes, beans, paper clips, blocks, etc. Give each group index cards and a pen or pencil as well.
- Each group creates “exhibits” of manipulatives to represent multiplication facts. Label each exhibit by writing the fact on a notecard folded in half to stand up like a tent. Sample exhibits:
- 3 stacks of 8 blocks each, with 3 x 8 = 24 on the sign
- 11 chains of 5 paper clips each, with 11 x 5 = 55 on the sign
- When all the groups have finished, everyone circulates the classroom to explore each other’s museum exhibits!
Teacher Tip: You can let kids choose the facts they’ll use, or provide a required list of facts for each group.
Multiplication Stories
- Give students a list of 5 to 8 multiplication facts.
- For each fact, students write a story problem on a notecard, with the correct answer on the back. Examples:
- Olivia and her 3 sisters each ate 12 jellybeans. How many did they eat altogether? (4 x 12 = 48)
- Lee’s baseball team scored 2 runs in each inning. There are 9 innings a baseball game. How many total runs did they score? (2 x 9 = 18)
- Once students are done, have them trade notecards for a fun way to practice!
Teacher Tip: Collect the notecards and use the story problems on a quiz or test, with a “byline” for each question.
Multiplication Flower Garden
- Cut a circle from yellow construction paper, and 12 petals to fit around the edge.
- Glue the petals to the circle so each one can fold freely back and forth.
- In the middle of the flower, write the first factor.
- On the front of each of the petals, write a number from 1 to 12—these are the second factors.
- Fold each petal in, and write the product of the two factors (middle factor X petal factor) on the back.
- Have each student or group work on a different fact flower from 1 to 12, then hang them all on a bulletin board for an interactive display!
Multiplication Zoo
- Challenge students to write a story problem about animals that fits a multiplication fact. Example: Nine spiders had a picnic in the park. Spiders have eight legs. How many legs were at the picnic? (9 X 8 = 72)
- Next, ask them to illustrate their story problem about animals.
- Finally, collect all the illustrations and hang them on a wall or bulletin board. Take a stroll through the “multiplication zoo”!
Coded Multiplication Messages
- First, students create the code by assigning a random multiplication product to each letter of the alphabet. (e.g. A = 36, B = 72, C = 12, etc.)
- Next, they decide on the coded message they want to write, and figure out the products that match the letters.
- Finally, students write a fact for each letter/product in their message. (e.g. if they want to write the word CAB using the examples above, they could write 6 x 2, 3 x 12, 9 x 8).
- Now, the fun part! Trade coded messages with a partner, and solve the equations to decipher them!
The Grapes of Math
- Give each student an individual whiteboard and marker, then turn story time into math time with The Grapes of Math by Greg Tang!
- As you read the rhyme on each page, pause so students can write down the multiplication problem they hear and figure out the answer. Have students hold up their boards to check their work.
- Continue the story, working your way through all the zany problems!
Multiplication Would You Rather
- Students work individually or in small groups to come up a Would You Rather question involving multiplication. Examples: Would you rather…
- Have 4 x 3 pennies or 1 x 2 nickels?
- Earn a score of 5 x 6 or 4 x 9 in a game of mini-golf?
- Do 2 x 12 minutes of math homework or 4 x 5 minutes of reading?
- Come together as a class. Share a scenario and solve the multiplication problem first.
- Then, argue it out! Some may have obvious answers (12 cents is more than 10 cents), while others could lead to fun discussions (some kids might prefer to spend a little more time doing math than spend the shorter amount of time reading).
Teacher Tip: Collect these and use them as bell ringers, morning meeting questions, or even creative essay topics!
Multiplication Chart Puzzles
- Print and cut apart multiplication charts to make a variety of square and rectangular pieces.
- Challenge students to reassemble the charts as quickly as they can, checking all the facts to be sure their puzzle is correct.
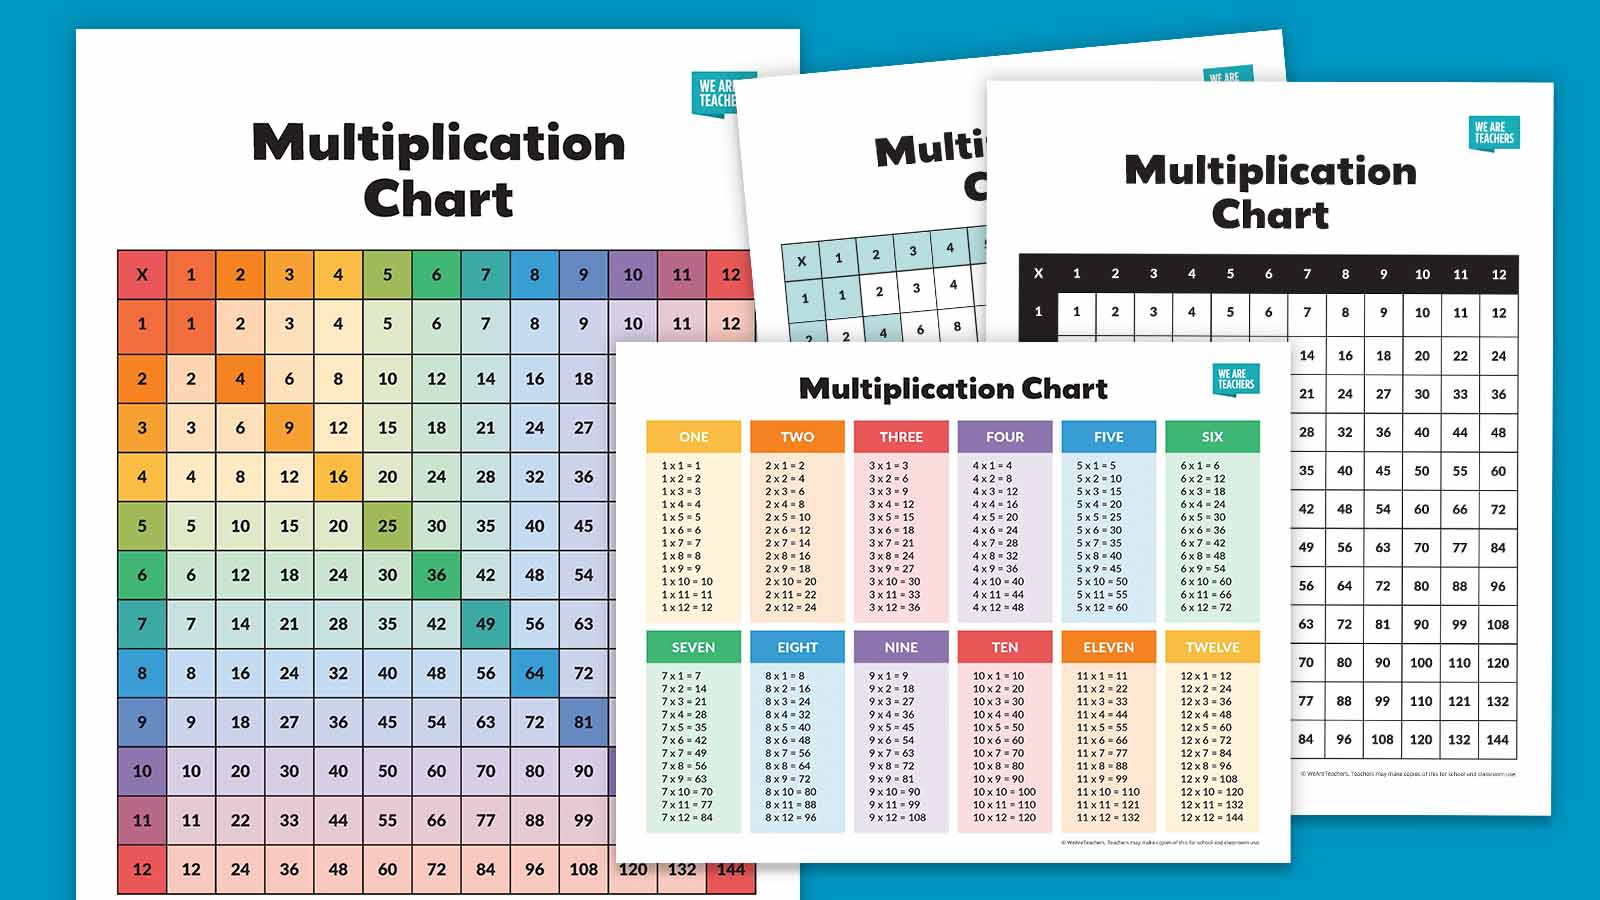
Multiplication Charts (Free Printables)
A variety of styles, in color and black and white—perfect for multiplication practice and games!
Multiplication Facts Practice
Brain Dash 60 Multiplication Facts
- Pull up Brain Dash 60 as a whole class game, or assign it for individual practice.
- Each time you play, compare your score to see if you’re getting faster!
Test your knowledge in 60 seconds!
Play Brain Dash 60 Multiplication Facts: How many math facts can you blast through in 60 seconds?
Calculator Checker
- Give each student a simple calculator.
- As you call out an equation, kids type in the two numbers, but DON’T let them press the equals sign button yet.
- Ask students to think it through and write their answer on a piece of scrap paper.
- Finally, they press the button to see if they’re right.
Teacher Tip: This one is especially fun as kids start multiplying with 2 and 3 digit numbers!
Product Call-Out
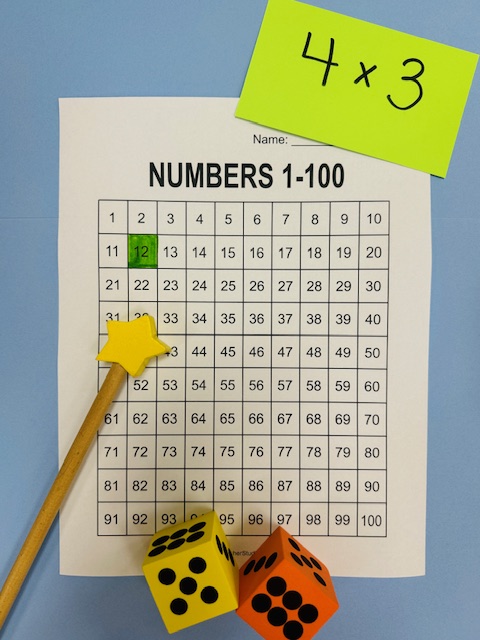
- Provide each student with a blank 100 chart, along with colored pencils, crayons, or markers.
- Call out multiplication facts and colors, like:
- Color the product of 4 x 3 green.
- Use yellow to color the product of 9 x 6.
- Reveal the correct colors and numbers when you’re done for an easy self-checking activity.
Triangle Fact Cards
- Make triangle fact cards for pratice:
- Cut triangles from cardstock.
- In two corners, write the factors for each fact. In the third corner, write the product. Add a multiplication sign in the middle if you like.
- To practice, kids hold the cards so their thumb covers the product at the bottom, then move their thumb to check their answers.
Teacher Tip: You can use these for division, too! Have students hold the card so their thumb covers one of the smaller numbers, then divide the large number by the remaining small number and check your answer.
Pool Noodle Multiplication
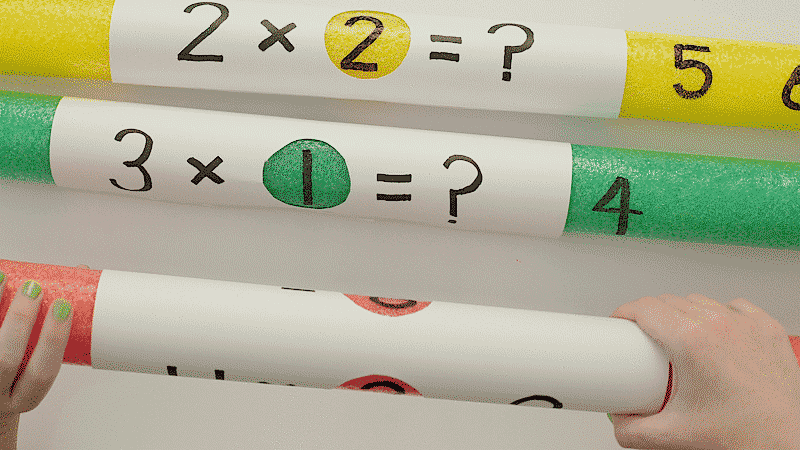
- Follow the directions here to learn how to make your own DIY Pool Noodle Multiplication tools.
- Try stocking them in your math centers for a fun way to practice multiplication!
Plastic Egg Matchup
- Write a multiplication fact on one half of a plastic Easter egg, and the product on the other half. Create set of these for facts you want to practice.
- Break the eggs apart and mix them up. Students see how quickly they can correctly match them back up!
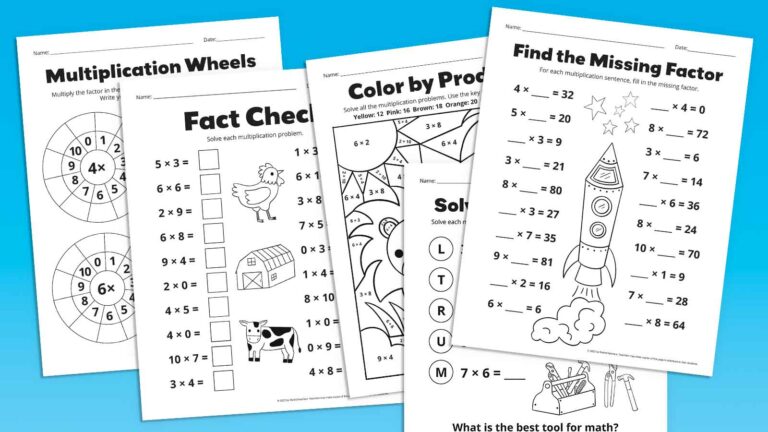
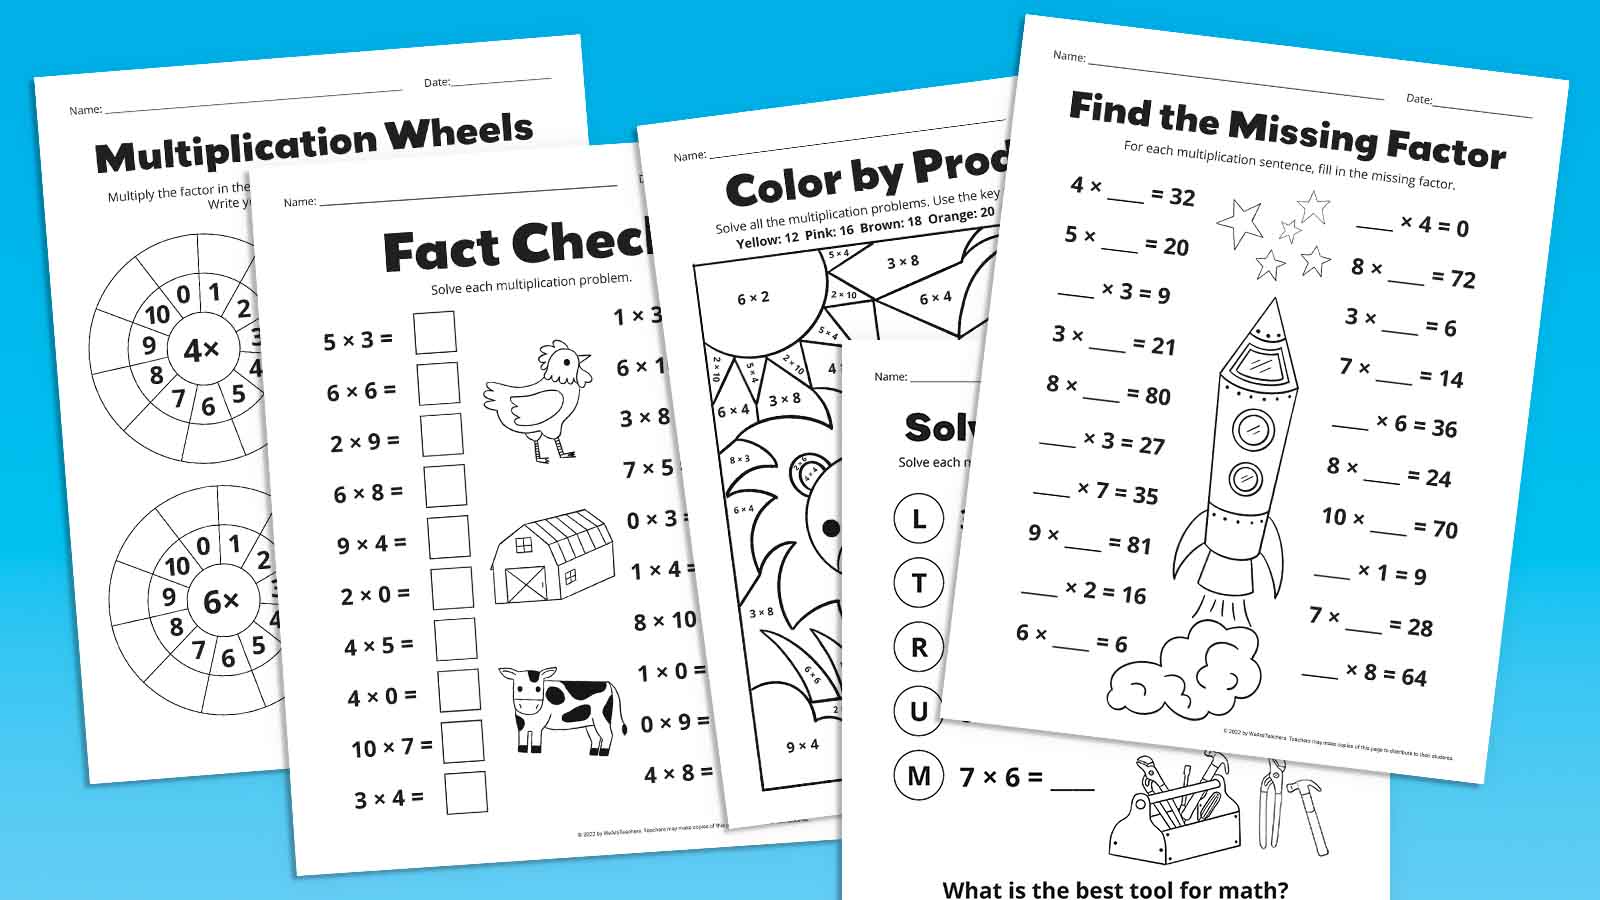
Don’t forget to download your free set of multiplication worksheets!

Plus, get all the latest teaching tips and ideas when you sign up for our free newsletters!