The best way to get kids excited about science is to get involved with hands-on experiments! While some experiments require expensive lab equipment or dangerous chemicals, there are plenty of cool projects you can do with regular household items. We’ve rounded up a big collection of easy science experiments that anybody can try, and kids are going to love them!
Jump to:
- Easy Chemistry Science Experiments
- Easy Physics Science Experiments
- Easy Engineering Experiments and STEM Challenges

Easy Chemistry Science Experiments
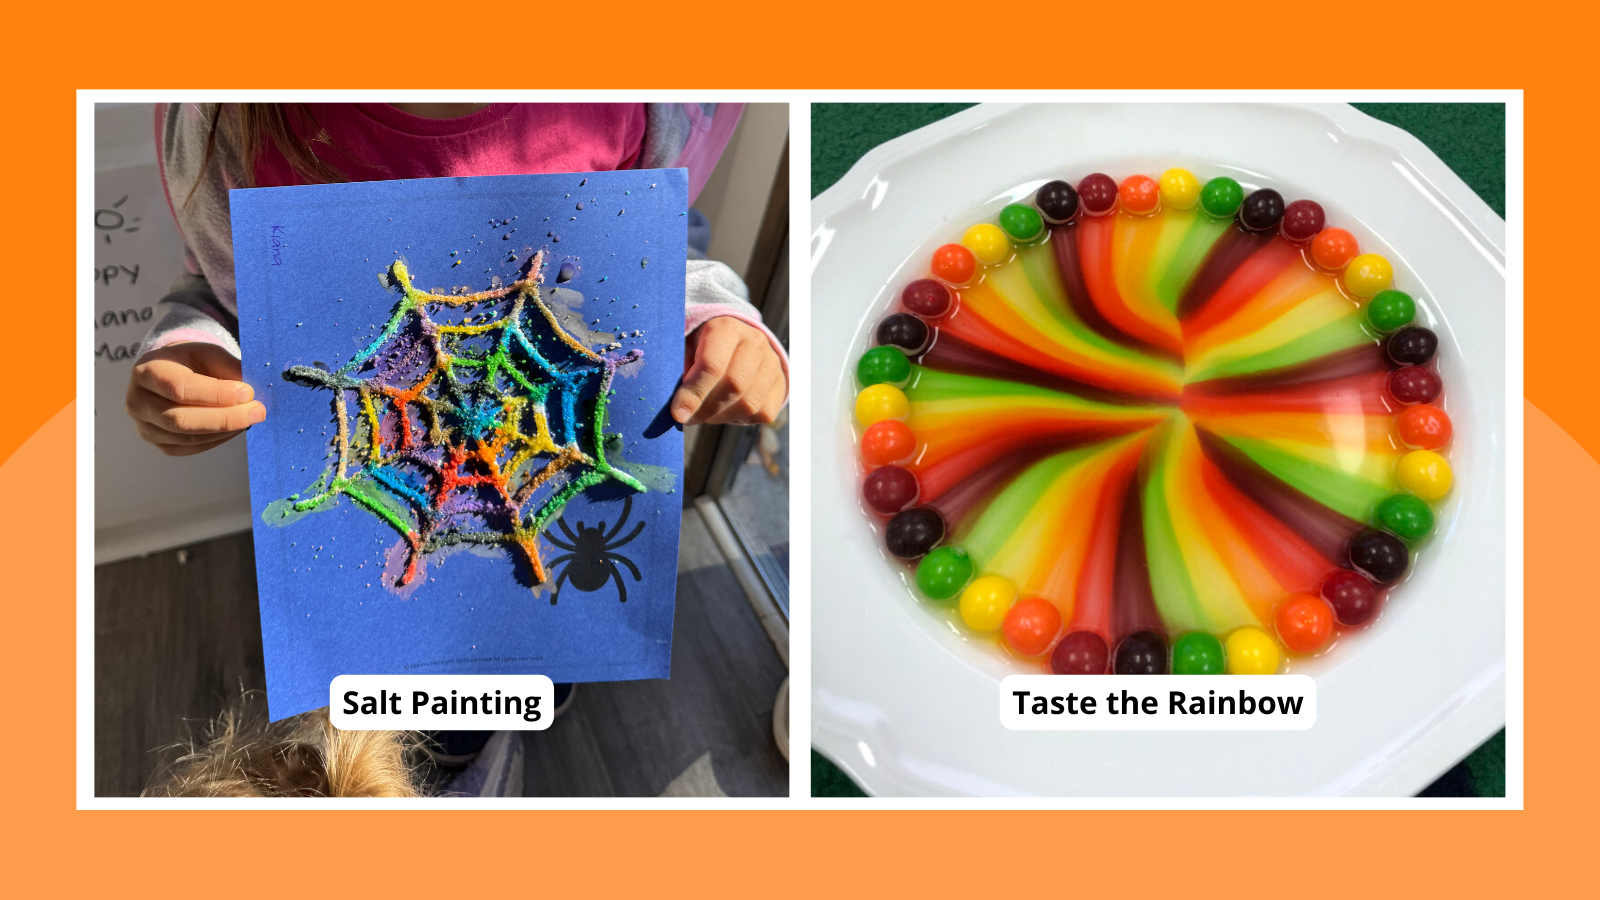
1. Taste the rainbow

Teach your students about diffusion while creating a beautiful and tasty rainbow. Create a circle of Skittles on a plate, then pour water in the middle of the bowl. Watch how the colors mix together once the liquid is added.
Learn more: Skittles Rainbow Experiment: How-To Plus Free Worksheet
2. Crystallize sweet treats
Crystal science experiments teach kids about supersaturated solutions. This one is easy to do at home, and the results are absolutely delicious!
3. Explore a Non-Newtonian Fluid

Create a simple mixture of water and cornstarch to make oobleck. Have students test how its materials can react under different stress conditions. Because Oobleck doesn’t follow the usual rules of liquids, it can be a lot of fun for your class to experience this anomaly.
Learn more: How to Make Oobleck (Free Printable Worksheet)
4. Make elephant toothpaste

Try another variation of erupting projects by mixing together elephant toothpaste. This fun project uses yeast and a hydrogen peroxide solution to create overflowing “elephant toothpaste.”
Learn more: Elephant Toothpaste (Guide + Printable Reflection Sheet)

5. Discover density with hot and cold water
There are a lot of easy science experiments you can do with density. This one is extremely simple, involving only hot and cold water and food coloring, but the visuals make it appealing and fun.
6. Layer more liquids
This density demo is a little more complicated, but the effects are spectacular. Slowly layer liquids like honey, dish soap, water, and rubbing alcohol in a glass. Kids will be amazed when the liquids float one on top of the other like magic (except it is really science).
7. Demonstrate the “magic” leakproof bag

All you need is a zip-top plastic bag, sharp pencils, and water. FIll up the zip-top bag with water, then quickly poke the pencils all the way through. Once students are suitably impressed, teach them how the “trick” works by explaining the chemistry of polymers.
Learn more: Leakproof Bag (Guide + Printable Reflection Sheet)
8. Grow a carbon sugar snake
Easy science experiments can still have impressive results. This eye-popping chemical reaction demonstration only requires simple supplies like sugar, baking soda, and sand.
9. Make homemade bouncy balls
These homemade bouncy balls are easy to make since all you need is glue, food coloring, borax powder, cornstarch, and warm water. You’ll want to store them inside a container like a plastic egg because they will flatten out over time.
10. Watch water move colors

Fill three small cups with water and add food coloring in each; red, yellow and blue. Then, set an empty cup next to each filled cup, creating a circle. Add a folded strip of paper towel inside each filled up, then into an empty empty, alternating the pattern. Check back in about an hour and notice how the water moved to each cup!
Learn more: Rainbow Walking Water Experiment: How-To Plus Free Worksheet
11. Create eggshell chalk
Eggshells contain calcium, the same material that makes chalk. Grind them up and mix them with flour, water, and food coloring to make your very own sidewalk chalk.
Learn more: Egg and Vinegar Experiment (Guide + Printable Reflection Sheet)
12. Turn milk into plastic
This sounds a lot more complicated than it is, but don’t be afraid to give it a try. Use simple kitchen supplies to create plastic polymers from plain old milk. Sculpt them into cool shapes when you’re done.
13. Create your own chalk paint

Explore mixtures and solutions by creating your own sidewalk chalk paint. Combine equal parts cornstarch and water for the base of the paint. Pour the solution into a muffin tin, then add food coloring to each spot. Take the solution outside and paint on the sidewalk to paint different images.
14. Test pH using cabbage
Teach kids about acids and bases without needing pH test strips. Simply boil some red cabbage and use the resulting water to test various substances—acids turn red and bases turn green.
15. Glitter Slime
Mix together liquid school glue, baking soda, contact lens solution and glitter to create this slime recipe.
Learn more: 4 Slime Recipes (Guide + Printable Reflection Sheet)
16. Fluffy Slime
Mix together liquid school glue, baking soda, contact lens solution, shaving cream and food coloring to create this slime recipe.
Learn more: 4 Slime Recipes (Guide + Printable Reflection Sheet)
17. Butter Slime
Mix together liquid school glue, baking soda, contact lens solution, hand lotion, air dry clay, and food coloring to create this slime recipe.
Learn more: 4 Slime Recipes (Guide + Printable Reflection Sheet)
18. 2-Ingrediant Slime
Mix together corn starch and liquid dish soap to create this slime recipe.
Learn more: 4 Slime Recipes (Guide + Printable Reflection Sheet)
19. Mix up some slime

Another non-newtonian fluid, something that has properties of liquids and solids, is slime. Test how the slime responds to different tests and whether it acts like a solid or liquid in that situation. We have a variety of ways to make slime, so try a few different recipes to find the one you like best.
Learn more: 4 Slime Recipes (Guide + Printable Reflection Sheet)
20. Clean some old coins
Use common household items to make old oxidized coins clean and shiny again in this simple chemistry experiment. Ask kids to predict (hypothesize) which will work best, then expand the learning by doing some research to explain the results.
22. Pull an egg into a bottle
This classic easy science experiment never fails to delight. Use the power of air pressure to suck a hard-boiled egg into a jar, no hands required.
23. Naked Egg

Take off the shell of an egg without using your hands! Soak a fresh egg in a jar of vinegar to dissolve the calcium carbonate in an eggshell to discover the membrane underneath that holds the egg together.
Learn more: Egg and Vinegar Experiment (Guide + Printable Reflection Sheet)
24. Blow up a balloon without blowing

Fill an empty plastic bottle with vinegar. Then, attach a balloon filled with baking soda on top of the water bottle. With the balloon still attached, dump the baking soda into the vinegar. The baking soda and vinegar balloon experiment demonstrates the reactions between acids and bases when you fill a bottle with vinegar and a balloon with baking soda.
Learn more: Baking Soda and Vinegar Balloon (Guide + Printable Reflection Sheet)
25. Assemble a DIY lava lamp

Explore density by combining oil, water and anti-acid tablets. Notice how the bubbles move up and down in the bottle by the chemical reaction between the anti-acid tablet and water. Water is denser, so it sinks to the bottom. Oil is less dense, so it floats on top. Thus, creating a lava lamp effect.
Learn More: DIY Lava Lamp Experiment: How-To Plus Free Worksheet
26. Explore how sugary drinks affect teeth
The calcium content of eggshells makes them a great stand-in for teeth. Use eggs to explore how soda and juice can stain teeth and wear down the enamel. Expand your learning by trying different toothpaste-and-toothbrush combinations to see how effective they are.
27. Mummify a hot dog
If your kids are fascinated by the Egyptians, they’ll love learning to mummify a hot dog! No need for canopic jars, just grab some baking soda and get started.
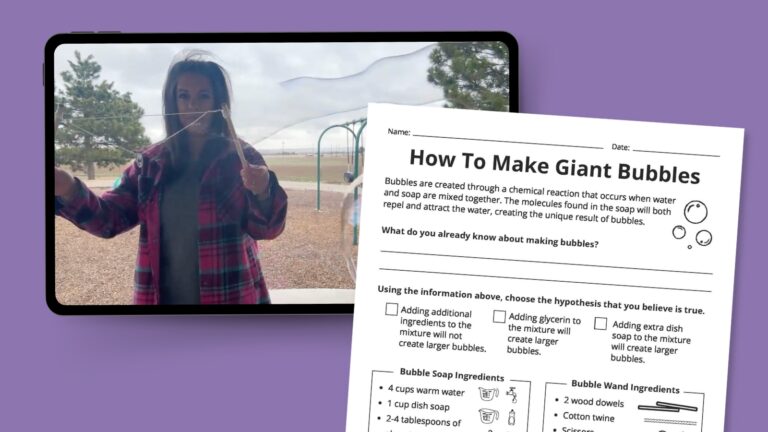
28. Blow giant bubbles
Kids learn about surface tension as they engineer these large bubble-blowing wands. Create the bubble solution by using dish soap, water and glycerin. By dipping the bubble wand in the solution and moving it around, notice the large bubbles being created.
Learn more: Giant Soap Bubbles (Guide + Printable Reflection Sheet)
29. Test Solubility
You need clear cups, water, and different substances to test, like sugar, salt, sand, and oil. Add each substance to a separate cup of water and stir to see which ones dissolve and which ones don’t. This helps kids compare solubility and understand how different types of matter interact with water.
30. Play with absorption with salt painting

Paint in a different way using water colors and salt. Trace a printed image with liquid white school glue, then generously pour glue on the salt. Let the salt dry, then paint with watercolor paints. Notice how the salt absorbs the watercolors. When kids drip paint onto the salted glue, the paint is pulled into the salt crystals.
Learn more: How To Create a Salt Painting (Plus Free Printable Worksheet)
31. Extinguish flames with carbon dioxide
Light a candle and talk about what fire needs in order to survive. Then, create an acid-base reaction and “pour” the carbon dioxide to extinguish the flame. The CO2 gas acts like a liquid, suffocating the fire.
32. Shoot a soda geyser sky-high

Combine Mentos and Coke soda to create an explosive reaction! Although you can’t see it, dissolved carbon dioxide is the invisible substance that makes soda bubbly and fizzy. As long as the soda remains in the bottle, the gas is kept in place through the pressurized conditions. When you shake a bottle of soda, some of that gas is released and the bubbles stick to nucleation sites or tiny defects on the inside of the container. If you open the shaken bottle, the bubbles will rapidly rise and push the liquid up and out of the bottle.
Learn more: Mentos and Coke Experiment (Guide + Printable Reflection Sheet)
33. Send secret messages with invisible ink
Turn your kids into secret agents. Write messages with a paintbrush dipped in lemon juice, then hold the paper over a heat source and watch the invisible become visible as oxidation goes to work.
34. Create dancing popcorn

This is a fun version of the classic baking soda and vinegar experiment, perfect for the younger crowd. The bubbly mixture causes popcorn to dance around in the water.
Learn more: Dancing Popcorn (Guide + Printable Reflection Sheet)
Easy Physics Science Experiments
35. Send a teabag flying
Learn about the science of hot air balloons with this outside experiment. Take an empty tea bag and shape it into a cylinder. Light the teabag on fire and watch how it rises in the air. Hot air expands and becomes less dense than the cooler air outside, causing the tea bag to float.
36. Create magic milk

In a shallow dish, pour in milk. Then add small drops of food coloring onto the surface of the milk. Using a cotton swab dipped into dish soap, you lightly brush the surface of the milk. The dish soap breaks the surface tension of the milk, and the soap molecules try to attach to the fat molecules in the milk. This causes swirls and bursts of fun rainbow colors.
Learn more: Magic Milk Experiment (Guide + Printable Reflection Sheet)
37. Watch the water rise
Learn about Charles’s law with this simple experiment. As the candle burns, using up oxygen and heating the air in the glass, the water rises as if by magic.
38. Create a Balloon Rocket
You need a balloon, a straw, string, and tape. Thread the string through the straw, tape the balloon to the straw, inflate the balloon, and let it go. The escaping air pushes the balloon along the string, demonstrating Newton’s Third Law of motion: for every action, there is an equal and opposite reaction.
39. Learn about capillary action
Kids will be amazed as they watch the colored water move from glass to glass, and you’ll love the easy and inexpensive setup. Gather some water, paper towels, and food coloring to teach the scientific magic of capillary action.
40. Test a Car on a Rolling Ramp
You need a toy car or ball and a ramp made from a board or piece of cardboard. Place the car at the top and let it roll down, then observe how fast it goes and how far it travels. This demonstrates gravity pulling objects downward and shows how the steepness of a ramp and friction affect motion.
41. Create Static Electricity

Draw and cut out different shapes onto tissue paper. Tape one end of the shape onto a hard surface. Rub the balloon on top of your hair to create static electricity. Float the ballon over the tissue paper shape to watch it rise up in the air from the static charge.
42. Create a simple compass
You need a sewing needle, a magnet, a small bowl of water, and a piece of cork or a bottle cap. Rub the needle with the magnet to magnetize it, place it on the cork or cap, and float it on the water. The needle aligns with the Earth’s magnetic field, showing kids how a simple compass works to find north.
43. Crush a can using air pressure
Sure, it’s easy to crush a soda can with your bare hands, but what if you could do it without touching it at all? That’s the power of air pressure!
44. Test Air Pressure
Grab a cup of water and an index card. Place the card over the top, flip the cup upside down, and carefully let go. The card stays in place and the water doesn’t spill. This shows how air pressure pushes up on the card with enough force to hold the water inside the cup.
45. Pendulum Swing
You need a string and a small weight like a washer or toy. Tie the string to the weight and hang it from a hook, doorknob, or sturdy rod so it can swing freely. Pull it to one side and let it go to see how gravity makes it swing and how energy changes between potential and kinetic as it moves back and forth.
46. Tell time using the sun
While people use clocks or even phones to tell time today, there was a time when a sundial was the best means to do that. Kids can create their own sundials using everyday materials like cardboard and pencils or even LEGO bricks. Take the creations outside and make observations and different times of the day and how the sun dial works to show time.
47. Launch a bottle rocket

Grab a cork, plastic bottle, cardboard, duct tape, and bike pump to learn about Newton’s 3rd Law of Motion; for every action there is an equal and opposite reaction.
Learn more: Bottle Rocket (Guide + Printable Reflection Sheet)
48. Make sparks with steel wool
You only need a piece of steel wool and a 9-volt battery. When you touch the battery to the steel wool, the electric current heats the metal strands, causing them to burn and create sparks. This demonstrates a chemical change and a chain reaction, because once a few strands ignite, the reaction quickly spreads through the rest of the steel wool.
49. Levitate a Ping-Pong ball
Attach a bendy straw to a plastic bottle, squeeze the bottle to blow air upward, and place a Ping-Pong ball above the straw so it lifts and floats. When you blow air through the straw, the fast-moving air creates an area of lower pressure above the Ping-Pong ball. The higher air pressure around the ball pushes it upward, making it float or “levitate.” This demonstrates Bernoulli’s principle: faster-moving air has lower pressure.
50. Whip up a tornado in a bottle
All you need is a clear bottle filled with water and a little glitter. When you swirl the bottle in a circular motion and then set it down, the water spins fast, creating a sparkling vortex. This shows how a vortex forms when water moves in a circular pattern and gravity pulls it downward.
51. Monitor air pressure with a DIY barometer
You need a glass jar, a balloon, a rubber band, a straw, tape, and a piece of paper with a scale. Stretch the balloon over the mouth of the jar and tape the straw on top as a pointer. As air pressure changes, the balloon surface moves up or down, making the straw rise or fall. This shows kids how a barometer measures air pressure to help predict the weather.
52. Peer through an ice magnifying glass
Students will certainly get a thrill out of seeing how an everyday object like a piece of ice can be used as a magnifying glass. Be sure to use purified or distilled water since tap water will have impurities in it that will cause distortion.
53. Test the pH of water

You need water samples, pH strips (or a pH meter), and a container for each sample. Dip a pH strip into the water or use the meter to test each sample, then compare the results to see if the water is acidic, neutral, or basic. This experiment teaches kids about pH levels and how scientists measure the acidity or alkalinity of liquids.
54. String up some sticky ice
You need an ice cube, a piece of string, and some salt. Lay the string on the ice cube, sprinkle a little salt on top, and wait a few seconds. The salt melts the ice slightly, and as it refreezes, the string stick. This shows how salt affects melting and freezing and demonstrating the concept of freezing point depression.
55. “Flip” a drawing with water
You need a clear glass or jar of water, a piece of paper with arrows drawn on it. Place the paper behind the glass of water and look through it. The arrows appear to flip direction. This demonstrates light refraction, showing how light bends when it passes from one medium (air) into another (water).
56. Color some flowers

You need white carnations, glasses or jars, water, and food coloring. Fill each glass with colored water and place a carnation in it. Over time, the flowers absorb the colored water through their stems, showing how plants use capillary action to move water from their roots to their petals.
57. Use glitter to fight germs
Everyone knows that glitter is just like germs—it gets everywhere and is so hard to get rid of! Use that to your advantage and show kids how soap fights glitter and germs.
Learn More here: Teach Kids How Germs Spread With This Free Printable Activity
58. Re-create the water cycle in a bag

You can do so many easy science experiments with a simple zip-top bag. Fill one partway with water and set it on a sunny windowsill to see how the water evaporates up and eventually “rains” down.
Learn more: Water Cycle Lesson Slides and Video
59. Learn about plant transpiration
You need a small plant, a clear plastic bag, and a rubber band. Cover a leaf or small branch with the bag and secure it with the rubber band. After a while, water droplets appear inside the bag, showing how plants release excess water through transpiration.
60. Clean up an oil spill
You need a shallow container filled with water, vegetable oil, items for cleaning up the spill (cotton balls, sponges and pieces of paper towels), and small plastic animals. Pour oil on the water and let students try to remove it using the materials. This experiment teaches problem-solving and shows how engineers clean up environmental disasters like oil spills.
61. Construct a pair of model lungs

You need straws, balloons, and rubber bands. Use a balloon and straw to create a simple lung model. When you blow into the straw, the balloon inflates like a lung. This demonstrates how our lungs fill with air, helping kids understand the respiratory system and how breathing works.
62. Experiment with rocks
You need a variety of rocks and some vinegar. Pour a little vinegar on each rock and watch for bubbles. If it fizzes, the rock contains calcium carbonate, like limestone. This experiment teaches kids how to identify certain types of rocks using a simple chemical reaction.
63. Turn a bottle into a rain gauge
All you need is a plastic bottle, a ruler, and a permanent marker to make your own rain gauge. Monitor your measurements and see how they stack up against meteorology reports in your area.
64. Build landforms

You need LEGO bricks or building blocks. Stack the bricks in layers to represent different rock layers, then gently push or slide sections to see how mountains, valleys, and other landforms can form. This experiment helps kids understand how Earth’s landforms are created through movement and pressure.
65. Take a play dough core sample
You need different colors of play dough and a straw. Layer the play dough to represent the Earth’s crust, mantle, outer core, and inner core, then use the straw to take a “core sample” through the layers. This demonstrates the structure of the Earth and how scientists study its layers.
Learn more Here: Love Play-Doh? Get more learning ideas here.
66. Project the stars on your ceiling
You need a paper cup, a pin or needle, tape, and a flashlight. Poke small holes in the bottom of the cup to represent stars, then shine the flashlight through the holes in a dark room. This DIY star projector shows how light and darkness affect what stars we can see, helping kids understand why stars are visible at night.
67. Make it rain
You need a cup of water, shaving cream, and food coloring. Fill a cup with water, add a layer of shaving cream on top to represent a cloud, and drip food coloring onto the shaving cream. When the “cloud” gets too heavy, the colored droplets fall through the water like rain, showing how clouds hold moisture and release it as precipitation.
68. Blow up your fingerprint
You need a balloon and some ink or washable paint. Lightly press your finger onto the ink, then onto the slightly inflated balloon. Inflate the balloon fully to see your fingerprint stretch and magnify, helping kids explore the unique patterns in fingerprints.
69. Snack on a DNA model
You need Twizzlers, gumdrops, and toothpicks. Use the Twizzlers to represent the DNA backbone and gumdrops as the base pairs, connecting them with toothpicks. This hands-on model helps kids visualize the structure of DNA in a fun and edible way.
70. Dissect a flower

Take a nature walk and find a flower or two. Then bring them home and take them apart to discover all the different parts of flowers.
Easy Engineering Experiments and STEM Challenges
71. Craft smartphone speakers
No Bluetooth speaker? No problem! Put together your own from paper cups and toilet paper tubes.
72. Generate Electricity with a potato

You need a potato, a copper coin or wire, a zinc nail, and some connecting wires. Insert the copper and zinc into the potato and connect them with wires to a small LED or clock. The potato acts as a simple battery, generating electricity through a chemical reaction between the metals and the potato’s acids, teaching kids how chemical energy can be converted into electrical energy.
Learn More: Potato Battery Experiment: How-To Plus Free Worksheet
73. Race a balloon-powered car

Create a balloon powered car by attaching a straw to the end of a balloon. Then, tape the straw on top of a toy car. Blow up the balloon using the straw and watch how the car rolls when the air is released from the balloon.
Learn more here: https://www.weareteachers.com/balloon-powered-car-experiment/
74. Build a Ferris wheel
Use wood craft sticks to design and build your own Ferris wheel, then test different structures to see which design spins smoothly and supports the most weight. This activity teaches kids about engineering, balance, rotational motion, and how forces work together to keep a structure stable.
75. Design a phone stand
Use simple materials to design and build a DIY phone stand, testing different shapes and angles to see which one holds a phone securely. This activity teaches kids about engineering design, stability, and why everyday inventions, like phone stands, solve real problems by making our lives easier.
76. Conduct an egg drop

Put all their engineering skills to the test with an egg drop! Challenge kids to build a container from recycled items they find around the house that will protect an egg from a long fall. You can test your design from a ladder or a tall structure at a playground (with adult supervision).
Learn more: Egg Drop Challenge Ideas
77. Engineer a roller coaster

You can use a variety of Makerspace materials: straws, cardboard, tape, or building blocks. Build a small roller coaster track and roll a marble or small ball down it. This hands-on challenge teaches kids about gravity, friction, and motion while encouraging creativity and problem-solving.
78. Build a solar oven

Explore the power of the sun when you build your own solar ovens and use them to cook some yummy treats. This experiment takes a little more time and effort, but the results are always impressive.
Learn more: Solar Oven (Guide + Printable Reflection Sheet)
79. Construct a Bridge
You need building materials like popsicle sticks, LEGO bricks, or cardboard. Construct a bridge without using glue or tape, stacking and interlocking the pieces so it supports its own weight. This experiment teaches kids about engineering, balance, and how forces like tension and compression work in bridges.
80. Step through an index card
This is one easy science experiment that never fails to astonish. With carefully placed scissor cuts on an index card, you can make a loop large enough to fit a (small) human body through! Kids will be wowed as they learn about surface area.
81. Test weight distribution with cups
You need several paper cups and some tape. Challenge kids to stack and arrange the cups to build a structure that can hold weight without collapsing. This activity teaches principles of physics, engineering, and structural design while encouraging problem-solving and creativity.
82. Build the tallest paper tower
You need sheets of paper and tape. Challenge kids to build the tallest tower possible using only these materials. This activity teaches engineering principles, balance, and structural stability while encouraging creativity and problem-solving.
83. Use rubber bands to sound out acoustics
Create a simple rubber-band “guitar” to explore how sound waves change based on the materials and shapes around them. Students can stretch rubber bands of different thicknesses and tensions across an open box, then pluck them to hear how the sound varies. This quick build always becomes a kid favorite!
84. Assemble a better umbrella

Challenge students to engineer the best possible umbrella from various household supplies. Encourage them to plan, draw blueprints, and test their creations using the scientific method.
85. Create a rain cloud in a jar
Bring weather science indoors with this fun hands-on project. Use shaving cream to mimic clouds and add drops of food coloring to simulate rain. It’s a great way to explore the water cycle without even having to step outside!
86. Build a LEGO Marble Maze

Design and build a marble maze using LEGO bricks and a baseplate, arranging walls, pathways, and obstacles to guide a marble from start to finish. As students test and refine their designs, kids naturally engage in problem-solving, spatial reasoning, and creative engineering. This hands-on challenge is always a hit because students love seeing whether their marble can successfully navigate the twists and turns they’ve built.
87. Brighten up with rainbow celery
Make your science lesson more vibrant with a splash of color. Drop celery stalks into glasses of water with food dye, and watch as the beautiful colors travel up through the stems.
88. Safely view a solar eclipse

Is a solar eclipse coming your way? Teach your students about the solar eclipse, and help them safely view this exciting event with just a few simple materials.
Learn more: Solar Eclipse Viewer (Guide + Printable Reflection Sheet)
Get your free printable science experiment recording sheet!

Just fill out the form on this page to get instant access to your free printable experiment recording sheet.