Understanding the various states of matter is one of the key concepts kids need for exploring chemistry and physics. Use our big list of activities to help them learn about the properties of the various states of matter and the way they change between states. Plus, explore the “fourth state of matter,” plasma, as well as solutions, suspensions, non-Newtonian fluids, and more. You’ll find states of matter activities for preschool, elementary school, and middle school and science fair ideas too!
Jump to:
- Simple States of Matter Activities for Pre-K to Grade 2
- States of Matter Activities for Grades 3 to 5
- Hands-On States of Matter Experiments and Demos
- Solutions, Suspensions, and Colloids Activities
- Plasma and Non-Newtonian Fluids Activities
- States of Matter Science Fair Experiment Ideas

Simple States of Matter Activities for Pre-K to Grade 2
These activities are quick and easy, perfect for introducing the concept of solids, liquids, and gases to the youngest learners. (Find more easy science activities for preschoolers here.)
1. Matter Discovery
Before you can talk about the states of matter, kids need to know what matter itself actually is. If it has mass and takes up space, it’s matter. Little kids can think of it this way: Can they touch it or hold it in their hand? It’s matter. On the other hand, things like light, heat, and sound are not matter; neither are feelings or thoughts. Give kids a variety of examples, and ask them to decide which are matter and which are not.
2. Evaporation Observation

All you need for this easy states of matter activity is water and some paper cups. Fill each cup with water about halfway, and draw a line with marker on the outside to show the starting level. Choose different places to set the cups (by a sunny window, next to a heat source, in a dark area, etc.). Check them every so often to see how much water has evaporated.
Teacher tip: Turn this into an experiment by asking kids to predict which location will cause the water to evaporate the fastest!
3. States of Matter Books
Read a book or two to introduce younger learners to the concepts of solids, liquids, and gases. Here are a few of our favorites to try:
- What Is the World Made Of? by Kathleen Weidner Zoehfeld, ill. by Paul Meisel
- What’s the Matter in Mr. Whiskers’ Room? by Michael Elsohn Ross, ill. by Paul Meisel
- Libby Loves Science: States of Matter by Kimberly Derting and Shelli R. Johannes
- The Solid Truth About States of Matter With Max Axiom, Super Scientist by Agnieszka Biskup, ill. by Cynthia Martin
4. Sorting Solids, Liquids, and Gases
Print or cut out pictures of various solids, liquids, and gases from magazines. Label three bins, one each for Solid, Liquid, and Gas. Ask kids to look at the pictures and identify the state of matter it shows, then sort them into the correct bins. Review their answers and help them understand any mistakes they may have made.
5. Solids and Containers
One property of solids is that they hold their own shape rather than changing to fit a container. Let kids experiment with this by giving them a variety of items and containers of different sizes and shapes. Note that some items fit in containers but don’t fill them entirely. Others don’t fit at all, due to their shape or size.
6. Liquids and Containers
Liquids, on the other hand, change shape to fit the container they’re in. Use the same containers, but this time fill them with a liquid like water. Pour the liquid from one container to the next, noting that the liquid changes shape to fit in each. Also note that the liquid doesn’t fill all the containers completely—liquids change shape but they don’t expand to fill their containers.
7. Gases and Containers
To show how gases fill a container, try using balloons of different shapes and sizes. As you blow them up, the air (gas) spreads out to fill them completely, no matter what size or shape they are.
8. Three States of Water

This is one of those classic states of matter activities that really helps kids understand the concept. Start with ice cubes, exploring their properties as a solid. Then, allow them to melt, and talk about what’s the same and what has changed now that it’s a liquid. Finally, heat the water (a hot plate works well for this in the classroom) and watch it turn into steam to show kids the final state of matter, gas.
9. Condensation in a Cup
This simple activity demonstrates both evaporation and condensation. Fill a cup about halfway with water and cover it tightly with plastic wrap. Set it in a warm place and check it in an hour or two to see the drops that have formed on the plastic wrap. Discuss how the water got there, turning into a gas as it evaporated and back into a liquid as it formed the condensation drops.
10. Hot and Cold Balloons
Gases expand as they get warmer and contract as they cool. You can easily see this in action with a balloon! Blow it up and tie it off, then measure the circumference at room temperature. Then, use a blow dryer to gently warm the air (be careful not to get too hot or too close, or the balloon may pop), and measure the new circumference. Finally, place the balloon in the freezer for a few minutes, and measure it one last time. So cool!
States of Matter Activities for Grades 3 to 5
As kids get older, Next Generation Science Standards kick in, including requirements for teaching the states of matter. Try this selection of learning activities to build knowledge and help them understand solids, liquids, and gases on a more detailed level.
11. Snack Food Particles

Give each student a small bag of cereal, M&Ms, or raisins to represent particles. Draw a square on a piece of paper, and fill it with snack pieces, packed tightly together. This represents the arrangement of particles in a solid. Now, remove some of the pieces and spread them out to show particles in a liquid. Finally, remove even more pieces and spread the remainder far apart—this arrangement represents a gas.
12. States of Matter Chart
Create a simple anchor chart that kids can copy into their notebooks as graphic organizers. Include information for each of the three states (solid, liquid, gas) including a definition, properties, and examples.
13. Cotton Swab Particles
You can do a similar activity using cotton swabs dipped in paint to create “particles.” Bunch the dots close together for solids, more loosely for liquids, and far apart for gas.
14. Matter Charades
Create a set of cards with a different solid, liquid, or gas on each. Divide kids into teams. One player from the first team draws a card and tries to act it out for their teammates to guess. Once they guess it, they must state whether it’s a solid, liquid, or gas to get the point!
15. States of Matter Collages

Place three pieces of chart paper on the wall—write SOLIDS in the middle of one, LIQUIDS on another, and GASES on the third. Give kids old magazines and have them look through for pictures and/or words to cut out and attach to the appropriate collages.
16. Human States of Matter
Turn kids into particles with a state of matter activity that gets everyone up and moving. Start by taping off a square about 5 feet by 5 feet on the floor. Have your students stand in the square, squeezing in as tightly as possible until it’s full. Ask them to try to move around without leaving the square—it will be difficult if not impossible, just as it is for particles in matter. Now, have about a third of the students leave the square and let the others spread out, moving around (and probably bumping into one another) like particles in a liquid. Finally, remove more kids so just a few are left, and let them move around freely, representing gas.
17. States of Matter Hunt
Create a scavenger hunt where kids search for all three states of matter while also meeting certain other requirements. For example, ask them to find:
- A solid that is red
- A liquid that has gas bubbles in it
- A solid smaller than your fingernail
- A container with more than one state of matter in it
- A solid that pours like a liquid
18. States of Matter Jigsaw Activity
Put students in groups of three, and assign each member of the group to become an expert on one state of matter: solid, liquid, or gas. Now, group together students by their state of matter assignments. Each group researches and learns about their assigned state of matter, becoming the “experts.” Finally, return each student to their original groups of three, and have them teach one another what they learned about their particular state of matter.
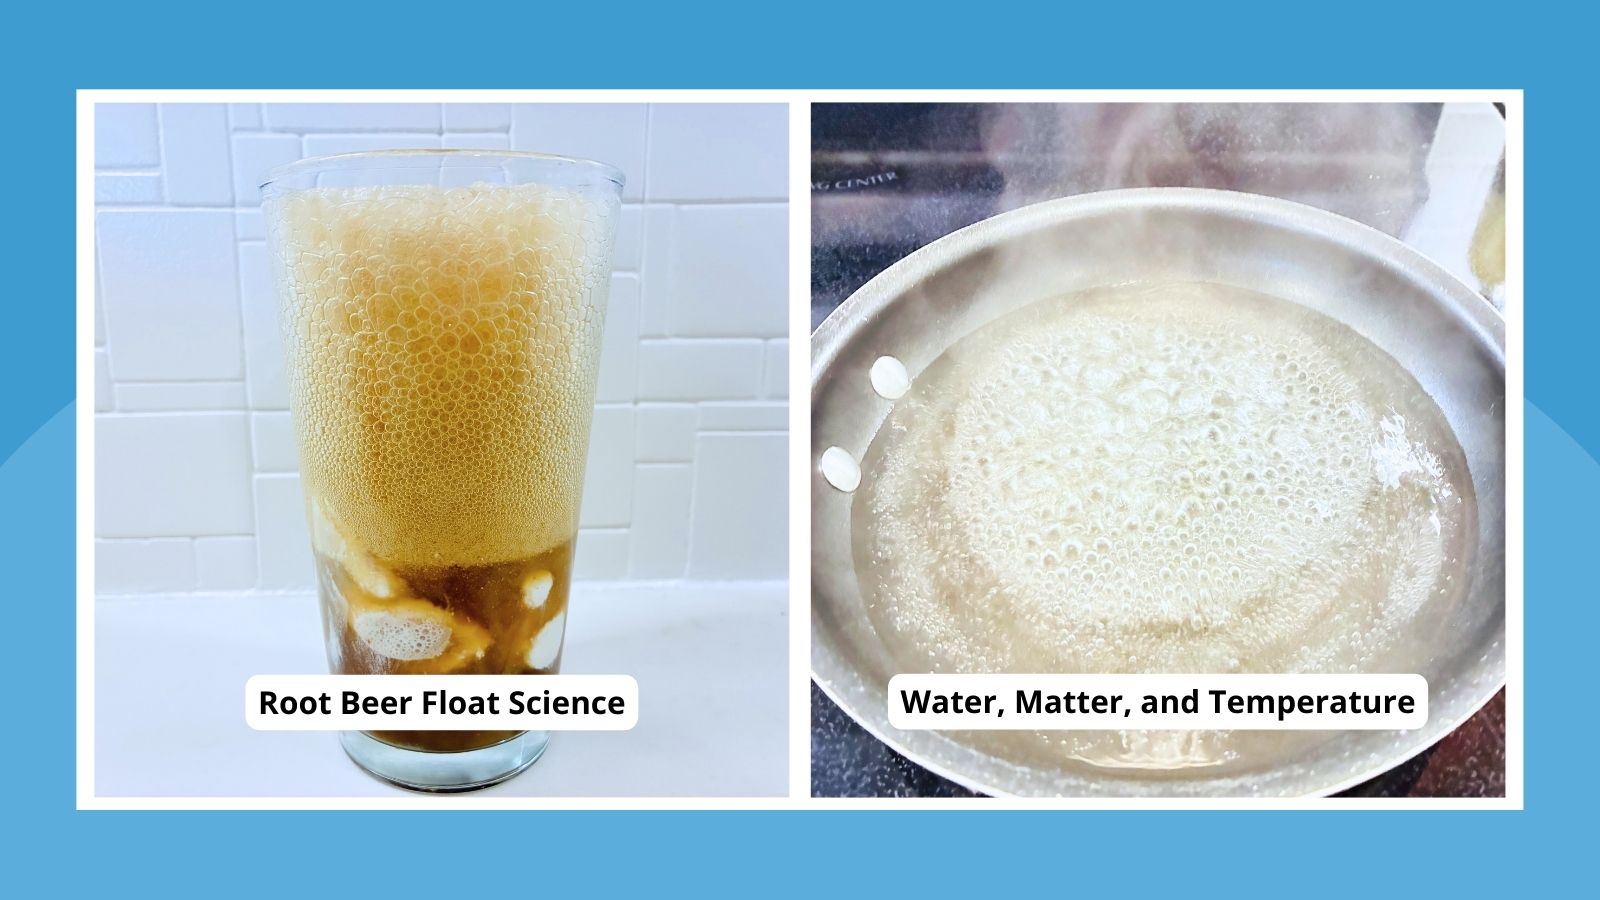
19. Root Beer Float Science

This is one states of matter activity you know kids are going to love! Drop a scoop of vanilla ice cream into a glass of root beer, then ask kids if they can identify the solid (ice cream), the liquid (root beer), and gas (bubbles in the soda). Bonus: The solid ice cream turns into a liquid as it melts!
20. Ice Cream in a Bag
If you’re really feeling ambitious, make your own ice cream for the floats described above! It’s a fun way to explore the change from liquid to solid.

Learn how to make ice cream in a bag, plus get a free worksheet for kids to use as they participate in this state of matter activity!
Hands-On States of Matter Activities and Demos
Nothing engages students more than live activities that allow them to see scientific principles in action. Whether they try it for themselves or watch you as the teacher perform a demo, these ideas will help reinforce the learning.
21. Baking Soda & Vinegar Balloon
Try this classic science class demo, where you combine a solid (baking soda) and a liquid (vinegar) to create a gas! When the balloon fills, kids will see a gas expand to fill its container, as promised.

FREE BALLOON EXPERIMENT WORKSHEET
Get complete instructions for this classic science activity, plus a worksheet to help kids observe and record the results.
22. Water, Matter, and Temperature

Matter changes from one state to another as the temperature changes. Warmer temperatures change solids to liquids and liquids to gases, while cooler temps do the opposite. The cycle is (almost) always the same: solid to liquid to gas, or gas to liquid to solid. See this in action by placing an ice cube in a saucepan. Check its temperature with a non-contact infrared thermometer. Set the saucepan on a stove burner on low heat, and watch the ice melt. Take the temperature again once it’s fully melted. Finally, turn up the heat until the water begins to boil and turn into steam. Take the temperature one last time.
23. Dry Ice Sublimation
Sometimes matter skips a step, going straight from solid to gas—a process known as “sublimation.” The easiest way to see this in action is with dry ice, which is actually frozen carbon dioxide. (This is definitely a demo for teachers to do, since dry ice can be dangerous to handle.) Place a piece of dry ice in a glass jar and stretch a balloon tightly around the neck. As the CO2 changes from solid to gas (sublimes), the balloon will inflate!
24. Crayon Transformation
Matter shifts from one state to another with the application or removal of heat. One easy way to show this is with broken crayons. Start by breaking the crayons into pieces and placing them into molds (it’s fun to use letter or number molds for this). Note that the pieces are solid and don’t spread out to fill the corners of the molds. Heat the crayons gently in the oven (around 300 degrees F) for a few minutes, and check their progress. As they melt into a liquid, they’ll spread out to fill in the shapes. When they’re fully melted, take them back out and let them cool back into solids (and a whole new set of crayons for coloring!).
25. Cloud in a Jar
You’ll need a glass jar with a lid, some ice cubes, warm water, and aerosol hairspray for this demo. Start by pouring some hot water (not boiling) into the jar, swirling it around to warm it. Pour out most of the water, but leave an inch or so in the jar. Turn the lid upside-down and set a few ice cubes in it, then carefully set the lid on the top of the jar. The ice will cool the air at the top. Now, quickly remove the lid, give a quick burst of hairspray (1 second or less) into the top of the jar, and set the lid back on. In a few seconds, you’ll see the “cloud” form as the water condenses around the aerosol gas droplets. Take off the lid and watch your cloud rise!
26. Soda Stream Gas Demo

If you’ve got a home carbonation machine like a Soda Stream, use it for this fun and simple states of matter demo! Fill your bottle with water, and drop in a couple of raisins. Watch for a few minutes to see if anything happens to them. Now, remove the raisins and refill the bottle, then carbonate it according to your machine’s instructions. Kids should be able to see the bubbles, but to make them more obvious, drop the raisins in again. The gas bubbles will stick to the raisins and cause them to rise and fall!
27. Heated Gas Expansion in a Balloon
Place a balloon over the neck of an empty glass jar, ensuring it creates a tight seal. Place the jar in a few inches of very hot water and watch closely. As the air inside heats, the gas particles will expand, causing the balloon to bulge! You can reverse this experiment by placing the glass bottle in a cold place—the balloon will be slightly sucked into the jar. (Allow the jar to cool to room temperature before transferring it to a cold place, otherwise the sudden temperature change could cause it to break.)
28. Rice & Sand: Granular Solids
Granular solids like rice and sand can feel a little confusing to kids, since they act like liquids in some ways and solids in others. Give students various containers plus some rice and sand to play around with. Note how they pour freely, like liquids, and somewhat take the shape of their container. However, you can make a pile of sand or rice, with sloping sides. That doesn’t work with liquids. What other similarities and differences can kids find?
Solutions, Suspensions, and Colloids Activities for Kids
When you mix liquids and solids, they combine into solutions (the solid dissolves in the liquid), suspensions (the solid is temporarily suspended in the liquid but will eventually settle out again), or colloids (the solid doesn’t dissolve but stays permanently suspended). Here are some fun ways to teach kids about all three.
29. Sugar and Sand in Water
Start with two clear containers of warm water. Drop a spoonful of sugar in one, and a spoonful of sand in the other. Stir each jar gently for two minutes, then observe the results. Note that the sugar has disappeared from view (dissolved), creating a solution. In the sand and water suspension, the sand slowly settles back to the bottom.
30. Hot and Cold Salt Water
Salt dissolves in water, creating a solution. However, it takes longer to dissolve in cold water than in hot. Try mixing some salt into separate glasses of hot and cold water and timing the difference until it’s fully dissolved in each. Explain that in hot water, the molecules move more quickly, “bumping” into the salt and helping to break it down.
31. Flour Water Suspension

Ask kids to predict when they mix flour with water—a solution or a suspension? Mix a tablespoon of flour into a glass of water, then watch the flour settle out over time. This simple activity is easy to turn into an experiment by creating and testing a hypothesis. What happens if you mix the flour into cold or hot water?
32. Cream to Butter
This experiment not only explores solids and liquids, but also the process known as emulsion. Cream is made of liquid milk fats dispersed in water. When you make butter, you separate the two! Place heavy cream in a glass jar, then take turns shaking it vigorously. Eventually, the solids in the cream will begin to clump together. Take the butter solids out and rinse them under cold water until the water runs clear. Knead the butter into a ball (add a little salt if you like). Now you have a solid (butter) and a liquid (buttermilk)!
33. Homemade Mayonnaise

To make homemade mayonnaise, put egg yolk and a little vinegar or lemon juice in a bowl. Slowly whisk in oil a little at a time, stirring constantly. The egg yolk has lecithin, which acts like a helper to hold the tiny drops of oil in the watery mixture. As you whisk, the oil spreads into tiny droplets, creating a thick, creamy emulsion of several liquids that won’t separate.
34. Jell-O Colloids
Demonstrate colloids with Jell-O! Have kids mix the powder with hot water and watch it thicken as it cools (add a few ice cubes to speed up the process). The tiny gelatin particles spread throughout the water and trap it inside, forming a wobbly gel. Even though it looks solid, it’s really a mixture of solids suspended in liquid that doesn’t settle, which is exactly what makes it a colloid.
Plasma and Non-Newtonian Fluids Activities
While solids, liquids, and gases are the three standard states of matter, there are a few types that don’t quite fit those categories, including plasma (super-hot, glowing gas) and non-Newtonian fluids, which have properties of both solids and liquids. Here are some fun ways to teach kids about these special types of matter.
35. Plasma Ball Demo
Plasma is especially hard to demonstrate in the classroom, since it’s found in things like lightning, the sun, and neon signs. However, a plasma ball is an inexpensive way to bring captive plasma to your classroom. Pick one up for around 30 bucks, then use it to show kids this type of matter in action.
Buy it: Katzco 7-Inch Plasma Ball Lamp at Amazon
36. Microwave Grapes Plasma Video
Another cool plasma demo involves microwaving loosely connected grape halves, but we don’t recommend trying this one yourself. Instead, check out this video that demonstrates the experiment and share it with your class.
37. Solid or Liquid (or Both?)
Introduce kids to non-Newtonian liquids (liquids that act like solids in some circumstances) with this simple open-ended activity. Give kids standard liquids like water, juice, or vegetable oil, and let them experiment with pouring them from container to container. Then, give them some non-Newtonian fluids such as toothpaste, peanut butter, hair gel, or silly putty. Let them experiment for a bit, then ask them questions like:
- How do these items behave like solids?
- How do they behave like liquids?
- What happens if you press on these items (add force)?
- Can you form a sloping pile with these items? Do they hold their shape over time?
38. Non-Newtonian Shapes and Molds
Try using those same items with cookie cutters, or filling containers and emptying them out to see if the various items hold their shape. Compare this with how the shapes and molds work with clay, salt dough, or play dough, as well as liquids like water or oil.
39. Homemade Oobleck
Oobleck is one of those unique substances that’s not quite like anything else! Made of cornstarch and water, Oobleck behaves like a solid when you apply pressure: It resists. When left on its own, though, it pours and flows like a liquid. Mix up a batch yourself and let kids play around with it—they’ll be surprised at the results!

Free Oobleck Recipe and Printable Worksheet
Get our free Oobleck recipe, plus a worksheet kids can use as they explore and experiment with it!
40. DIY Slime
Slime is another one of those unique solids that sometimes acts like a liquid. And kids absolutely love to play with it! Stir up your own batches using one or more of our recipes, then ask kids to consider what properties slime has that are more like a solid and which ones are more like a liquid.

DIY Slime Recipes and Worksheet
With four different recipes and worksheets to help kids observe and reflect, this free slime printable bundle is perfect for the classroom or home!
41. Kinetic Sand Play
If slime feels a little messy, try making your own kinetic sand instead. Simply mix five parts sand to three parts cornstarch, then slowly stir in about one part oil. Keep stirring until the mixture is fully incorporated and sticks together while you squeeze it. Let kids play around with it, noting its liquid and solid properties, and talk about how it’s another example of matter that doesn’t fit neatly into a single state.
42. Mud Pies
Here’s one last fun way to play around with unique states of matter. Make mud by combining dirt and water in different ratios. See if you can find a mix that acts a bit like Oobleck—solid when you poke it hard, but liquid enough to flow and pour.
States of Matter Science Fair Experiment Ideas
School science fair on the horizon? States of matter projects can be a lot of fun! Here are some questions to pose and potential experiments to find the answers. Don’t forget to grab our free printable experiment recording worksheet to guide the process!
43. Does salt make ice melt faster?

Experiment: Place ice cubes in the wells of a muffin tin. Add different amounts of ice to some of the wells, leaving others with just the ice as control. Observe the ice over time to see if the wells with salt affect the process. Variables: Change the size of the salt crystals, or add other materials like sugar or sand to some wells.
44. Which liquid evaporates more quickly: water or rubbing alcohol?
Experiment: Fill two clear jars, one with plain water and one with rubbing alcohol. Draw a line on the side of the jar to show the starting level of each. Check on the jars every few hours to measure the results. Variables: Try this with hot and cold water.
45. Does air take up space?
Experiment: You’ll need an empty plastic water bottle and a small uninflated balloon. Stretch the balloon over the opening of the bottle, forming an airtight seal. Now, try to push the balloon down into the bottle as far as you can. What happens? Next, remove the balloon and squeeze the bottle to push some air out, then reattach the balloon. Repeat the experiment. What happens this time? What can you conclude?
46. Does surface area affect water evaporation rate?
Experiment: Gather several containers such as a tall thin glass, a large bowl, and a flat-rimmed baking sheet. Measure and pour the exact same amount of water into each container. Observe them to see if the water evaporates more quickly from one container than another.
47. Does heat make solids dissolve in water more quickly?
Experiment: Mix salt or sugar into water of different temperatures, and time how long it takes to fully dissolve (no crystals are visible in the water). Variables: Start with cold water and gently heat it as you stir, or start with warm water and cool it as you mix in the salt or sugar.
48. How does salt affect the freezing point of water?

Experiment: Fill some wells of an ice cube tray with plain water. Make varying solutions of salt water to fill the others (weaker with less salt or stronger with more salt). Check the tray from time to time by sticking a thermometer into each well. Observe the appearance of each well too—is the water liquid, slushy, or forming ice crystals in any part? Compare your results.
49. How can you separate solids from liquids in a solution?
Experiment: Mix several solutions of salt water and sugar water. Ensure the sugar and salt are both fully dissolved. Pour the solutions into shallow pans, and leave them out so the water can evaporate, leaving the solids (sugar or salt) behind.
50. Do sugar and salt dissolve in water at the same rate?
Experiment: Stir a tablespoon of table salt into room-temperature water, and time how long it takes to fully dissolve. Repeat the experiment with sugar, and compare the results. Variables: Use larger and smaller grains of salt or sugar (rock salt and rock sugar, or finely ground salt and superfine castor sugar).
51. How does Oobleck react to different forces?
Experiment: Use different types of force to see if Oobleck resists them all in the same way. For example, poke it with the flat side of a spoon, the tines of a fork, a chopstick, the tips of your fingers, and the flat of your hand. Vary the speed at which you move the objects. How does the Oobleck react? Is it easier to push some objects into it than others?
Grab your free science experiment recording sheets before you go!

Use this sheet with any of the experiments or demos in this roundup. It reinforces the scientific method and helps students develop their observation skills. Just click the link below to get it.
