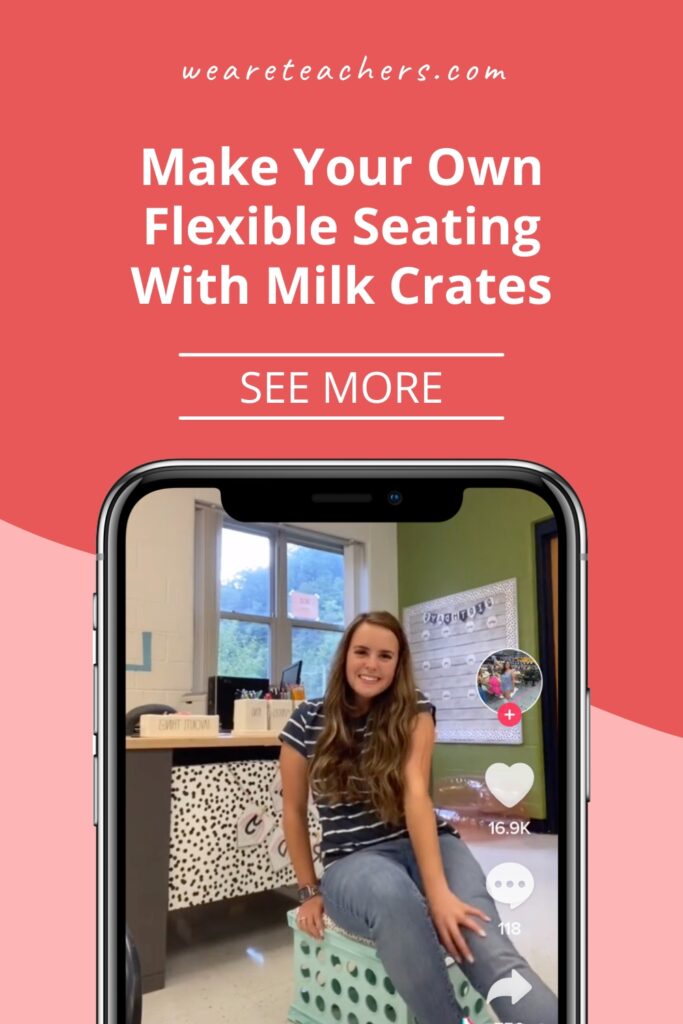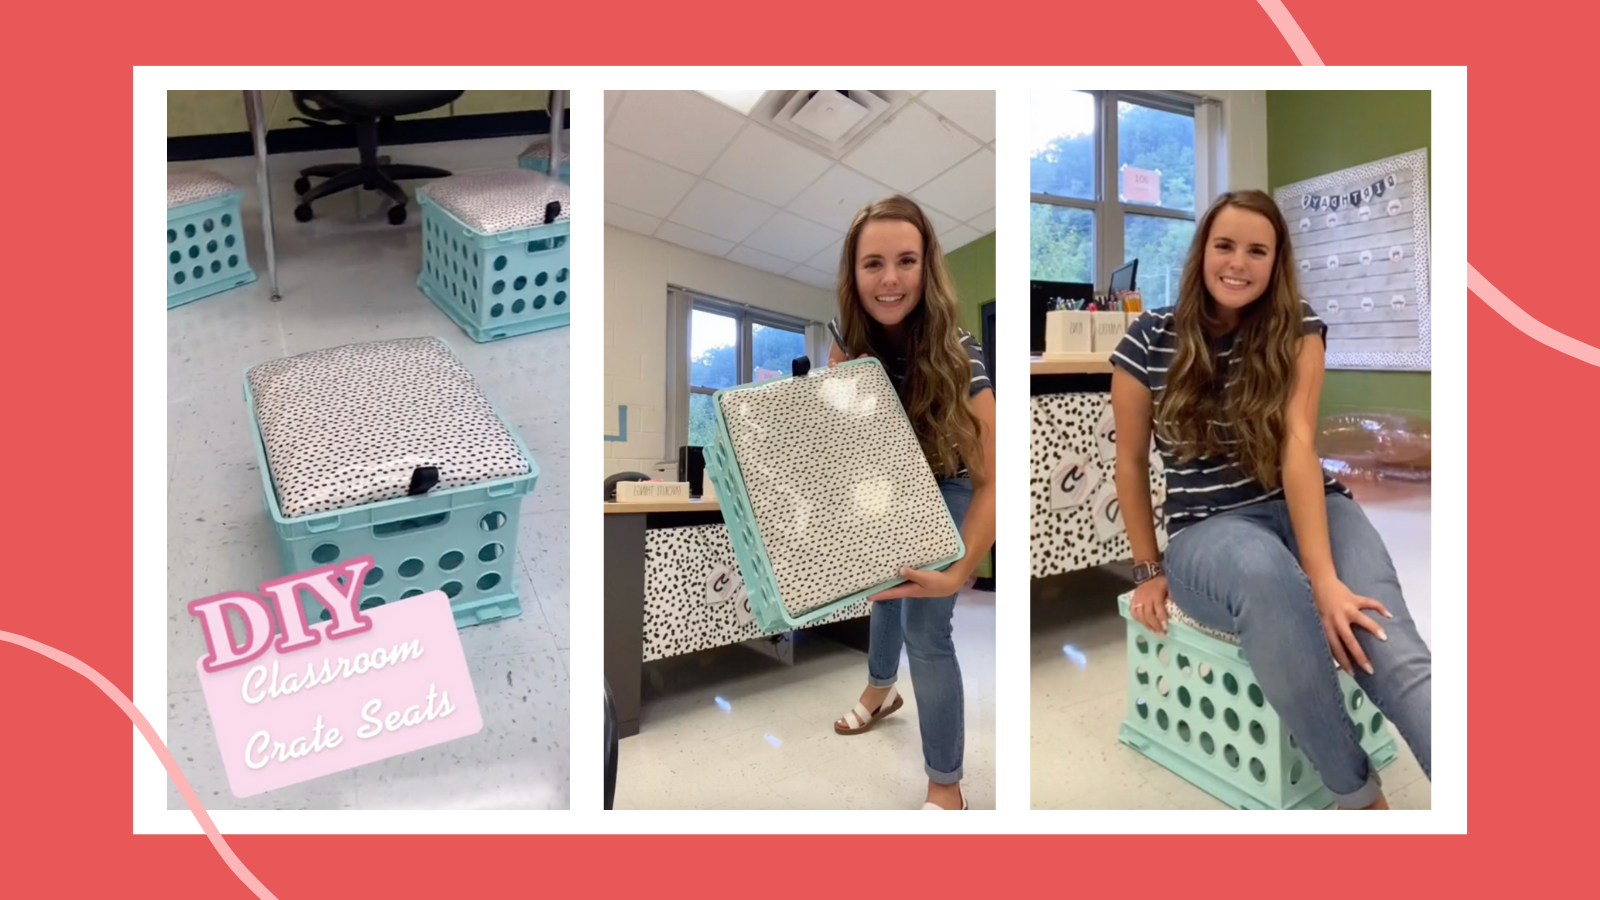
Flexible seating just got easier and cheaper with these milk crate chairs. Kaitlyn Hardy is an elementary teacher, and she posted these classroom DIY flexible seating crates on her TikTok. Using her tips, you could make a set of four crates for just $10 to $20, depending on what you already have. She made it easy on herself by having her local home improvement store cut specific boards for her. Then it was easy to turn them into seats. Here’s her video, plus quick step-by-step instructions of how she made them.
@kaitlynhardy34 Loving these crate seats!💕 #teachertiktok #myteacherwins #teacherhack #teacher #diy
Supplies You’ll Need
- Crates
- Pre-cut boards for the seats
- Padding
- Fabric
- Plastic shower curtain
Step 1: Get toppers for your crates.
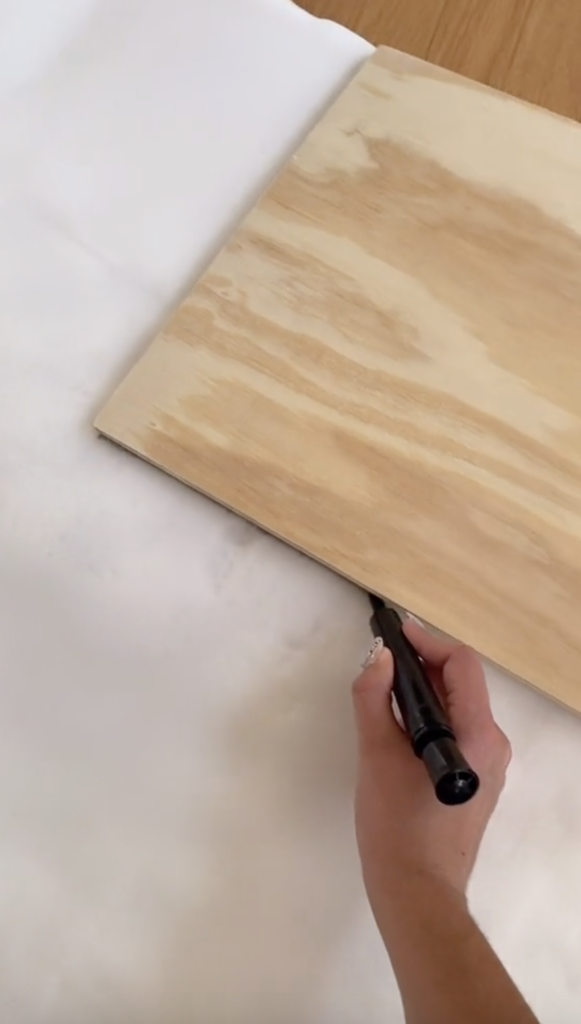
Find a set of crates. You might have a set of these already or you can get some donated. (There are still plenty of school cafeterias that have extras.) Then if you want to take Kaitlyn’s lead, take your crates directly to your local lumber, hardware, or DIY store. She took hers to Lowe’s and told them she’d like boards cut to precisely fit on the top of the crates. She said it was free to have the cuts done, and having them take the measurements was helpful.
Step 2: Add padding.
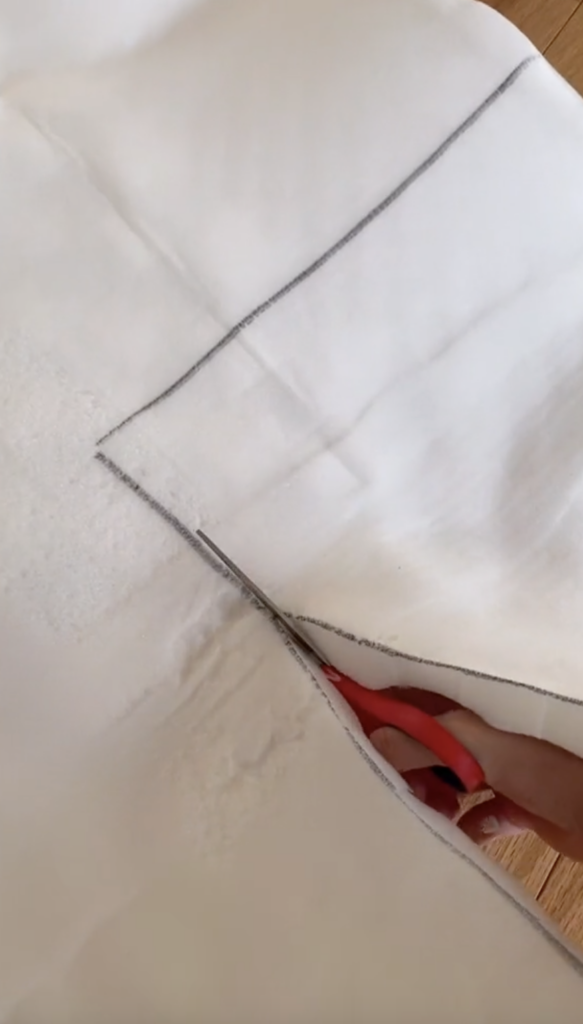
Get the padding you want to use. Kaitlyn used a mattress topper, which she picked up for about $10. You could also buy foam pieces or even repurpose something you have at home. Take the boards you had cut and trace them exactly onto the padding.
Step 3: Cover with fabric.
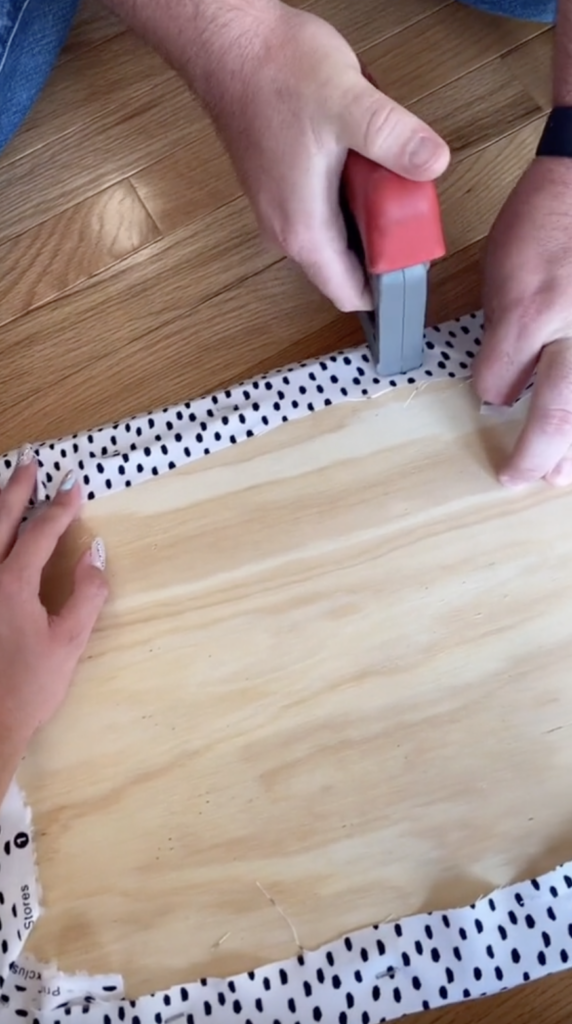
Choose a fabric, and then cut out a similar shape as the square seats. You will want to add a few inches (anywhere from 2 to 5) all around the edges. Then layer your board, padding, and top material together. Secure on the backside with a staple gun. Kaitlyn also suggests covering the seat with a clear shower curtain so you can easily clean it. Staple in the same way as you did the fabric.
Step 4: Put it all together.
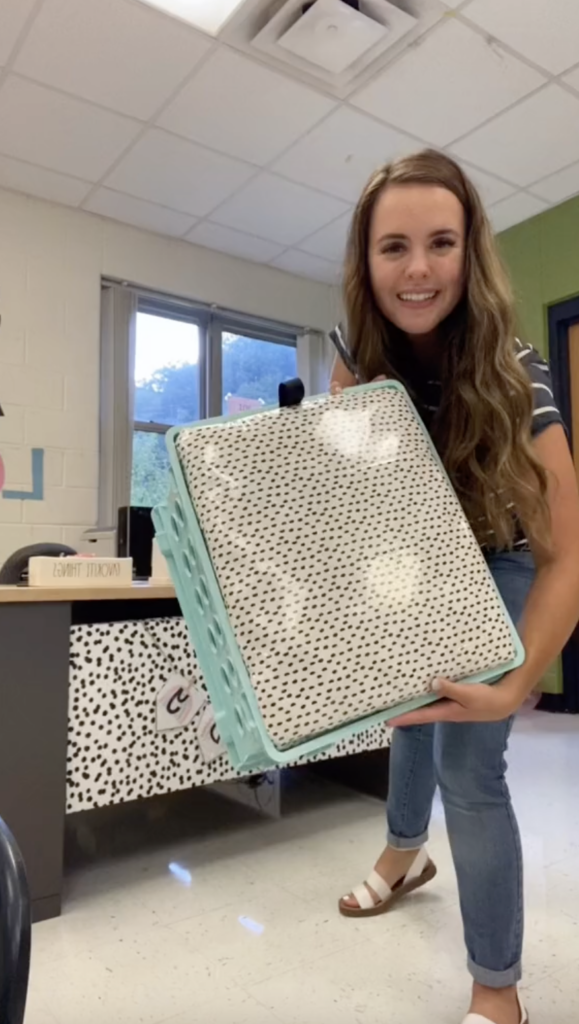
Since your boards are perfectly cut to nestle into your crate, now all you should have to do is drop them in and have a seat. If you need extra storage in your classroom, you can definitely add some items under the seat. Otherwise, keep it open for a tidy look.
Do you have DIY flexible seating ideas? Let us know in the comments!
For more articles like this, be sure to subscribe to our newsletters.