One of the most common challenges that teachers face is planning engaging, hands-on lessons that are accessible to all students. Teachers know that a one-size-fits-all approach doesn’t work. That’s why I’m a big fan of the choice board. Choice boards can be implemented for any grade level or subject. They typically include a wide array of activities of varying difficulty. As a result, all students, regardless of learning style, are able to get the skills and learning they need.
Here’s how I use choice boards in my classroom.
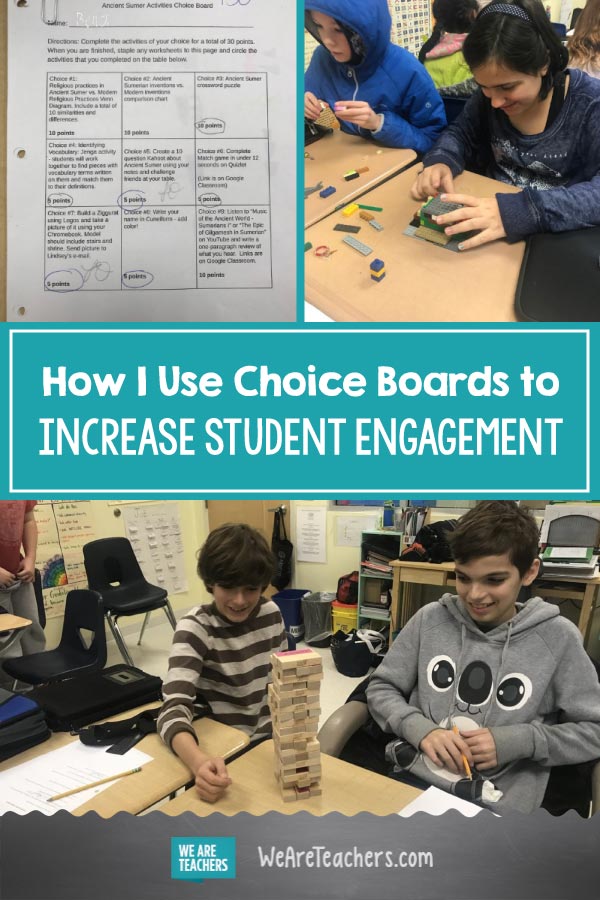
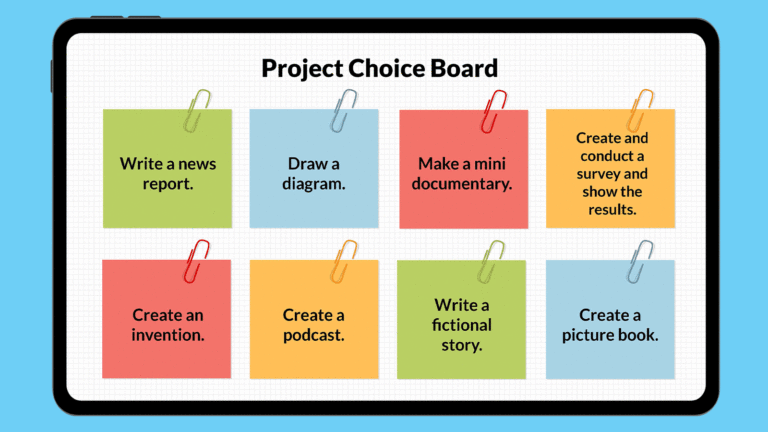
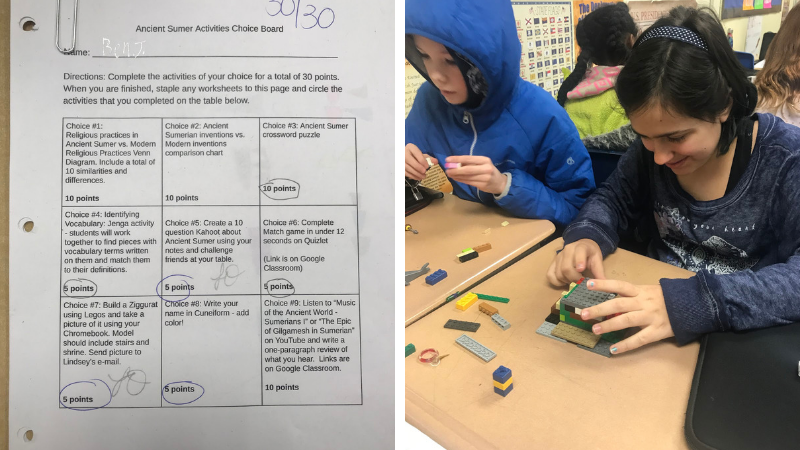
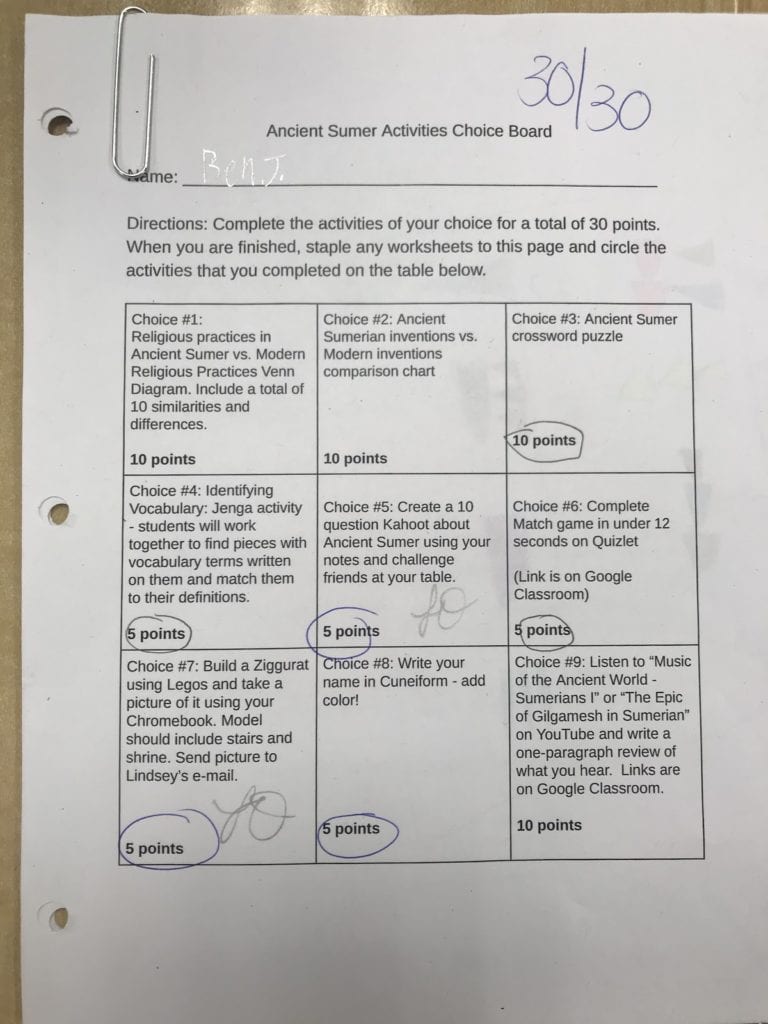
The setup of a choice board is simple. First of all, I plan at least nine activities that can be done at stations or centers around the classroom. Each activity is then assigned a point value based on the level of difficulty or work required to complete it. Students must acquire a certain number of points by doing activities of their choice.
When I introduce the activity to the class, I distribute the choice board and review directions orally as students follow along. Next, I walk around the room, visiting each station and explaining each activity. That way, students know where to find them and what to do. At each station, I place another set of directions, this one specific to that activity. I have found this extremely helpful, especially for students who need information presented in smaller chunks. Of course, everything that students need to complete the activity is waiting for them at the station. This really helps avoid confusion.
[contextly_auto_sidebar]
Choice boards should offer a variety of activities that appeal to all learning styles.

Another benefit of using choice boards for inclusion classes is that modifications can easily be made without students feeling different or separated from their peers. A professional development seminar that my school held on UDL (Universal Design for Learning) really resonated with me. CAST, a nonprofit education research and development organization, defines UDL as “a framework to improve and optimize teaching and learning for all people based on scientific insights into how humans learn.” This approach really motivated me to be extra diligent in creating lessons that were accessible to all learners.
Here are examples of activities from the choice board shown above:
| Assignment | Learning Style |
|---|---|
| Compare & contrast: Venn diagram | Visual |
| Ancient Sumerian inventions vs. Modern inventions comparison chart
|
Visual |
| Crossword puzzle | Visual |
| Identifying vocabulary: Jenga activity | Kinesthetic/Tactile |
| Build a Ziggurat using LEGOs | Kinesthetic/Tactile |
| Write & decorate your name in Cuneiform | Kinesthetic/Tactile |
| Ancient Sumerian music review | Auditory |
| Create a review game using Kahoot | Visual & Kinesthetic |
| Play match game on Quizlet | Visual & Kinesthetic |
Choice boards require a decent amount of preparation, but their outcomes are worth the extra time.
The students are learning, but they are also having fun while doing it. When students get to select the activities they do, they are involved in their own learning. This sets them up for success, and as a result the classroom becomes a safe haven for them. Consequently, they develop a positive attitude toward education.
Students also appreciate a teacher who they know is willing to go the extra mile for them. They can tell when a teacher thought outside of the box while planning assignments. If you’re looking to create an engaging, hands-on lesson that allows students to take ownership of their own learning, then give choice boards a try.
Have you tried choice boards in the classroom? Come and share your experiences in our WeAreTeachers HELPLINE group on Facebook.
Plus, how I engage middle and high school readers by offering more student choice.