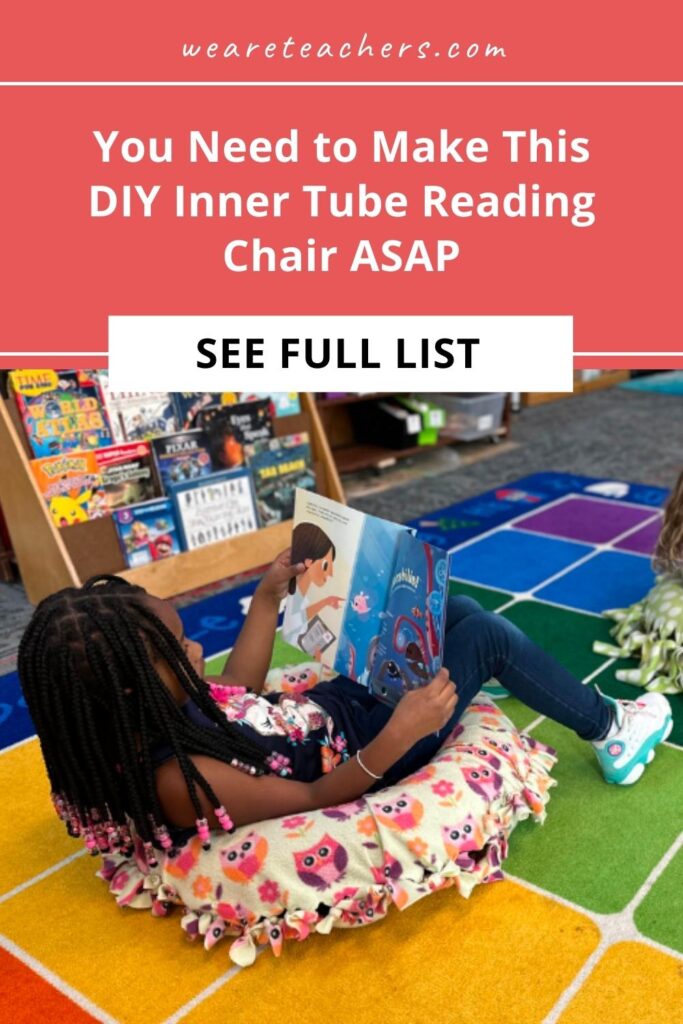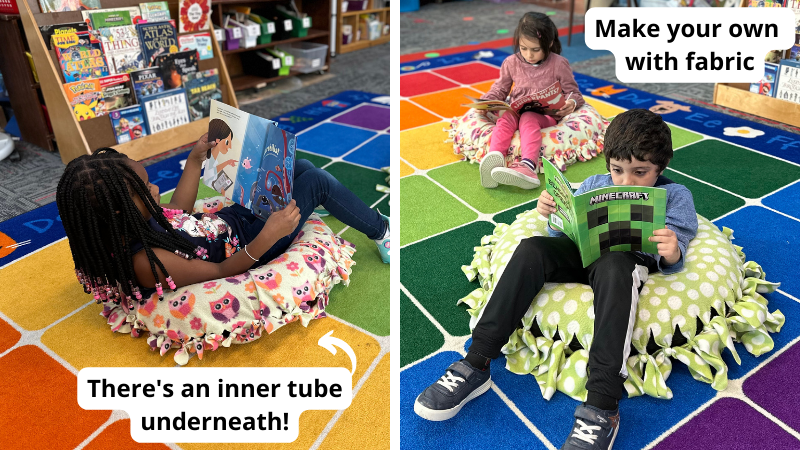
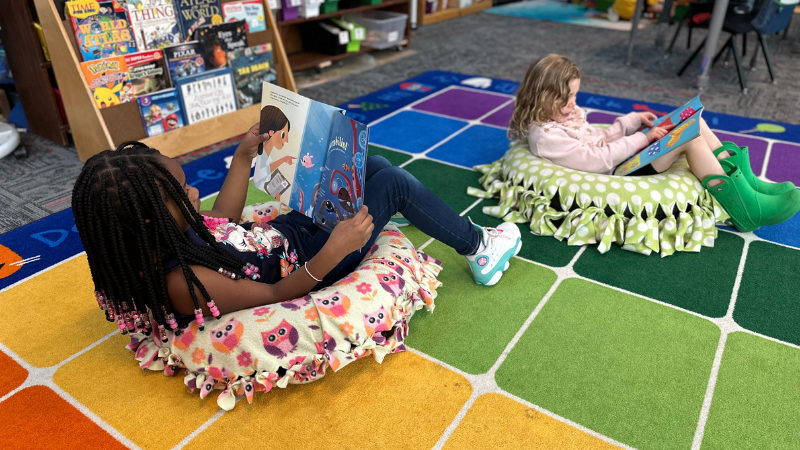
These inner tube reading chairs have been going strong for more than four years in this kindergarten classroom. The kids like to call them their reading donuts. We made them by using the same cut-and-tie method you use for those no-sew fleece tie blankets. All you have to do is choose the fabric—maybe to match your classroom theme or school colors—then just cut, tie, and go.
We first made these more than four years ago, and they’re still holding up, even with kids jumping and bouncing around on them. The kindergarten teacher who has them in his room says they are a classroom favorite during reading time. The key to making them last is to start with a heavy-duty inner tube, like this one on Amazon. You can also pick up an inner tube in the tire section of your local store.
What You Need
Just a heads up, WeAreTeachers may collect a share of sales from the links on this page. We only recommend items our team loves!
- Inner tube (try the Tube in a Box or the Adventure Tube)
- Fleece fabric
- Scissors
- Pencil
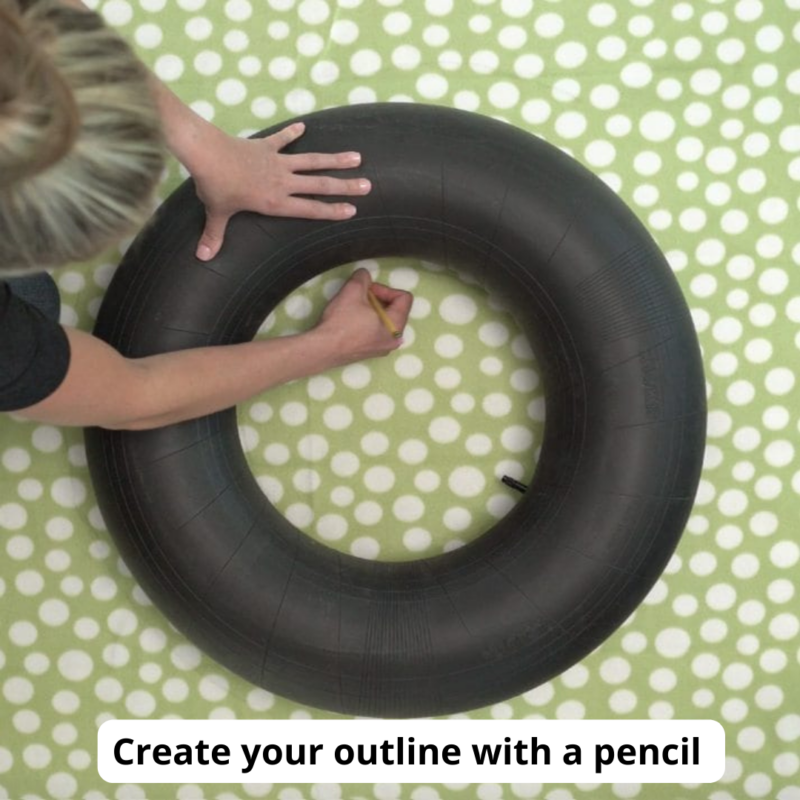
Step 1: Inflate your tube and measure your fabric.
\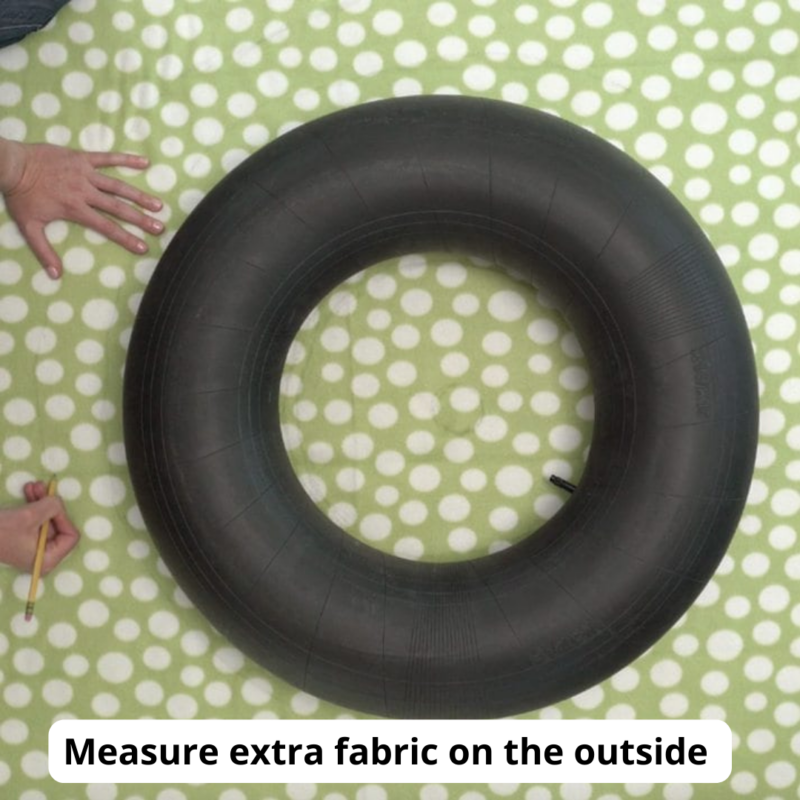
Remember the key is to get a THICK tube—the summer pool ones probably won’t hold up for long. We recommend a tube around 24 to 36 inches in size. Then inflate it. The amount of material you need will depend on the size of your tube, but in general, we recommend about 2 or 3 yards. Then layer your fabric with the dull sides up to give you a top and bottom. Using a pencil, lightly trace the inside and outside of your tube. Then, 5 to 7 inches from the outside tracing of the tube, trace another circle.
[contextly_auto_sidebar]
Step 2: Create your pattern.
Lightly trace strips onto the inside of your circle and then the outside, where you added 5 to 7 inches. Keep in mind that you want to trace a small circle on the inside area before you trace the strips. Don’t worry about it being perfect. The most important thing to remember is that you don’t want your strips too thin.
Step 3: Cut your strips.
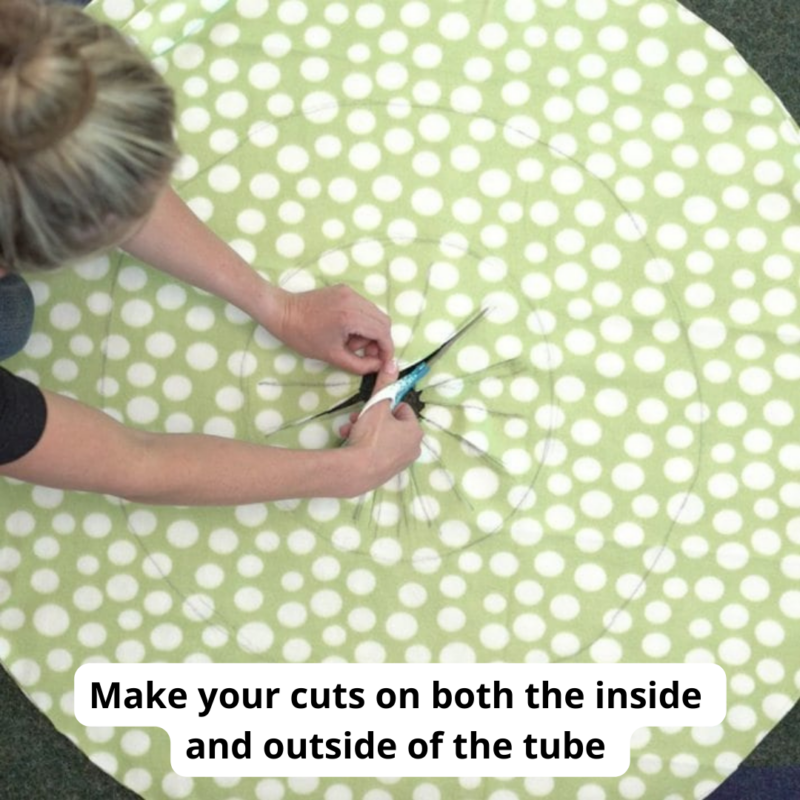
You’re ready to cut. First, cut out that small circle on the inside of your tube. Then cut your strips. You want to cut the strips about three-quarters of the way to the outlined edge you made earlier. You can always cut more if you need to. Repeat on the outside, also cutting about three-quarters of the way.
Step 4: Separate and layer.

Now that you have your strips, pull apart your two fabric layers and place one on top of the inner tube. Try to line up the fabric as best as possible, having the top and bottom match. If you’d like to add extra coverage to your tube, you can attach a strip of scrap fleece material to the inside of your tube. This will keep the inner tube from showing through in spots.
Step 5: Tie it all up.
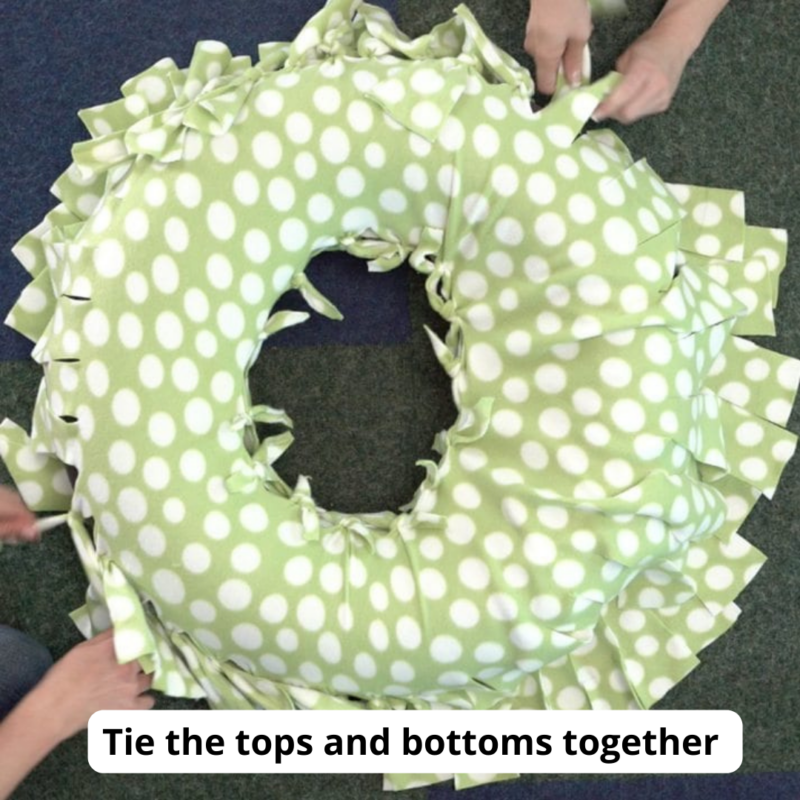
Tie everything together! This is the fun part, and you can definitely solicit help from a friend or your students. Be sure to tie around the air valve. That way if your tube gets slightly deflated, you can just add more air.
Watch our video for more info on making these DIY inner tube chairs.
What creative things have you made for your classroom? Come share in our WeAreTeachers HELPLINE group on Facebook.
Plus, check out how to make a pool noodle reading chair!