When you ask your students to do peer review of their writing, do they stare at you with puzzled expressions? Here are five specific, hands-on approaches to peer conferencing that your students can really sink their teeth into.
Revising and editing a peer’s writing helps students learn to work as a team. It also gives them a fresh perspective on the proofreading process that will help them become more aware as they write and edit their own work. So, how can you make the peer review and editing process engaging, meaningful and fun for students? Here are five ways to get your students excited about peer review that actually work!
- Neon Revision
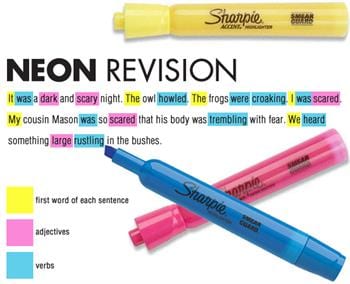 Many kids don’t know what or where to mark when reading another student’s work. Neon revision is an approach that can really help. First, give each student or pair of students three highlighters and these instructions:
Highlighter Markers: 3 Colors
Yellow – Mark the first word of each sentence. Questions to think about: Is there variety? Does the writer use transitional words? Are there any sentence fragments or run-ons?
Pink – Highlight each adjective. Think about: Is the writing descriptive? Are the adjectives strong and specific?
Blue – Highlight each verb. Think about: Are there too many “to be” verbs? Are the verb choices strong?Students begin by highlighting specifics. Then, remind them to look at the big picture. After highlighting, they can make comparisons and add suggestions about what the student needs to add, adjust or remove. Proofreading will come later. First, they are helping a peer with sentence fluency and word choice—both descriptive language and “showing without telling.”
Teach students about the revision sandwich: compliment, suggest, correct. Remind students that when reviewing someone’s work, always start out by saying what they like about their work. Next, they make a suggestion and converse with their partner. Students ask questions. Then, they make corrections. By working together, they both learn from each other.
- Writing Wheel Checklist
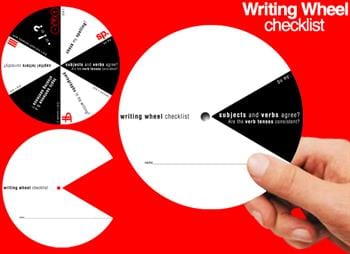 Have students assemble their writing wheels using this template, a piece of plain paper and a brad for the center. To assemble, cut out both circles and attach with the brad. Explain that they will use the writing wheel checklist to help them edit one another’s writing. Students should do each task on the wheel as they review another’s work. The writing wheel checklist is portable, so students could even check their peers’ writing from home on a class blog! Students can post their writing on a kid-friendly blogging site such as Kidblog or Weebly, where peers can write comments. Using their writing wheel as a reference, students will know how to assess their classmates’ compositions for conventions.
Click here for a PDF of the Writing Wheel Checklist.
- Revising vs. Editing (What’s the Difference?)
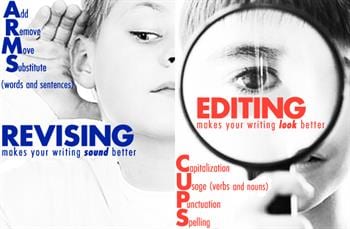 Students need to know the difference between revising and editing in order to help refine their peers’ writing. Revising makes writing better. Editing makes writing correct. A popular approach in many classrooms is to use the acronyms ARMS (for revising) and CUPS (for editing).
Revising (The big picture)
Add words and sentences (be descriptive, capture all ideas).
Remove words and sentences (be concise).
Move words and sentences (sentence fluency, organization).
Substitute words and sentences (word choice, voice).Editing (Conventions)
Capitalization
Usage (Verbs and nouns—does it make sense?)
Punctuation
SpellingTo help students with their understanding, say you use your arms and hand to hold your ear to help them remember that when you revise, you want the writing to sound better. If you punch a hole in a cup and look through it, you are using your eyes. This will help them remember that when you edit, you want your writing to look better. Students could even create a telescope made out of a paper cup and call it their Revisoscope! Check out Busy Bee Kids Crafts to see how to construct one. Once students know the difference between revising and editing and have the acronyms memorized, they can jot them down on a Post-it note when checking a peer’s writing. The acronyms will remind students of what to look for and how writing can be improved to make it look and sound better!
- Proofreading Spectacles
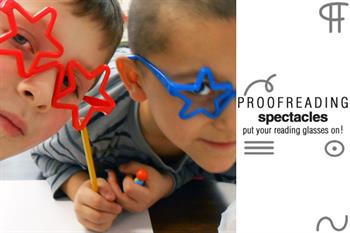 Put your proofreading spectacles on, it’s time to edit! To make editing for conventions fun, have students wear crazy glasses with the lenses popped out of them. It will motivate students and encourage them to look closely at their peers’ writing. Remind students to always reread to check for misunderstandings in writing. You can purchase glasses at the dollar store or a party supply store. You could also have students create their own glasses out of paper.
 - Switch! Revising and Editing Stations
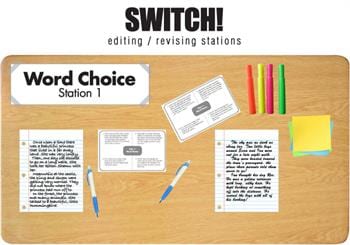
Set up six stations around the room. Label each station with one of the following titles:
1. Word Choice
2. Ideas and Content
3. Organization
4. Sentence Fluency
5. Voice
6. ConventionsPrint out Be the Editor task cards for students to use when revising and editing at each station. Students use Zaner-Bloser’s task cards to help them discuss and check one another’s writing! The task cards provide the children with prompts, making editing/revising easier. By concentrating on one writing trait at a time at each station, students will not feel overwhelmed. Along with the task cards, put out highlighters, sticky notes, colored pencils and other writing utensils to keep students interested.

